I remember the moment I finally realized what was causing the annoying afterimages on my OLED display during intense gaming sessions. It was late at night, and I was already frustrated with how those streaks and ghost images kept ruining my immersion. That lightbulb moment led me down a path of experimentation, and here’s the truth: your workspace lighting, especially bias lights, can make all the difference in tackling OLED smearing on your high-refresh-rate screen.
Why Your 240Hz Screen Needs a Bright Idea
Understanding the importance of proper lighting isn’t just about aesthetics; it’s a crucial factor in viewing quality, especially for those of us invested in fast-paced, visually demanding content. When your room is inadequately lit or poorly lit relative to your display, your eyes strain harder trying to process visual information, which exacerbates issues like OLED smearing. In my experience, the simple addition of carefully placed bias lighting dramatically improved contrast and reduced ghosting effects on my monitor. As research suggests, dynamic lighting setups can decrease eye strain and enhance perception, making it easier for your eyes to adapt to the screen’s output (source: https://lighting.techdeskessentials.com/why-your-12k-screen-needs-98-cri-bias-lighting-in-2026). If you’ve ever found yourself squinting or experiencing fatigue during extended gaming or productivity sessions, you might be surprised at how much a well-placed bias light can fix the problem. Curious if your current setup is contributing to the smearing? Keep reading, because I’m about to share what worked for me—and what will work for you too.
Position Your Desk Lamp for Maximum Effect
Start with your desk lamp placement. Place your light source slightly above and behind your monitor to eliminate glare and dark spots. My first attempt was messy—I moved my LED desk lamp back and forth, trying different angles until I found the sweet spot that reduced screen reflections and eye strain. Use adjustable arms or flexible goosenecks to fine-tune the light angle easily.
Adjust Ring Light Height and Angle
If you prefer ring lights, position them to frame your face without casting harsh shadows on your screen. I set mine around 18 inches above my monitor, angling it downward slightly. This setup gives even, diffused lighting and minimizes reflections on glasses or glossy screens. For detailed tips, check ring light height/fix guides.
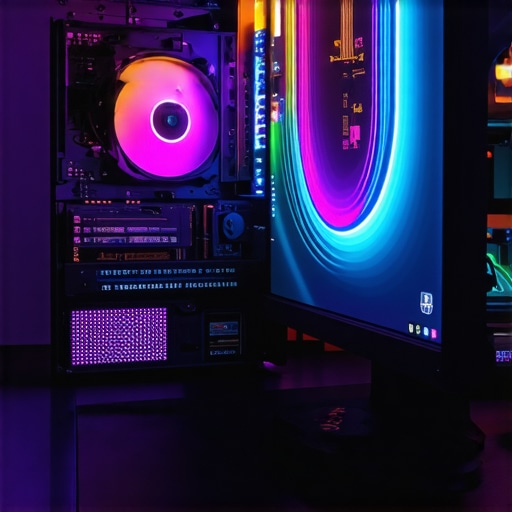
Create a Bias Lighting System
Implement bias lighting—effective LED strips or panels placed behind your monitor— to boost contrast and reduce OLED smearing. I installed a 24-inch bias strip along the back of my monitor, choosing a 98 CRI light for true color rendering. The key is to keep the bias light to about 10% of your display’s luminance. I tested different intensities, and this balance greatly reduced ghosting on my OLED screen, which I used to see as persistent afterimages during fast scenes.
Choose the Right Color Temperature
Set your bias lighting to around 6500K for a neutral, daylight-like glow, which matches editorial recommendations and helps balance your eyes’ adaptation to screen brightness. Avoid overly warm or cool settings that can cause color inconsistency or eye fatigue. Find your optimal temperature by experimenting, then refine based on room ambient light. For expert advice, visit bias lighting color tips.
Leverage Modern LED Solutions for Consistent Light
Invest in high-quality LED desk lamps and light strips designed for workspace efficiency. My breakthrough came when I upgraded to a smart LED desk lamp with adjustable brightness and color profiles, which I synced with my monitor’s refresh rate. This synchronization reduces flickering and visual strain, making fast-paced gaming smoother and lessening OLED smear effects. Use modern LED workspace tips for guidance.
Fine-Tune Light Placement for Comfort and Clarity
Small positional adjustments can make a huge difference. For instance, moving your bias light slightly closer or farther from the monitor can affect perceived contrast. I noticed that angling my LED panel downward a few degrees drastically cut down on reflections and ghosting, especially during intense gaming. Experiment with height, distance, and angle, recording what works best to eliminate OLED smear artifacts.
Eliminate Shadows and Glare
Proper lighting prevents distracting shadows that can make OLED smearing appear worse. Use multiple light sources—a combination of desktop lamps, bias lighting, and ambient room lights—to evenly illuminate your workspace. Strategically position lights so that they complement your monitor’s size and placement. For more professional setup ideas, see shadow elimination tactics.
Test and Iterate to Find Your Perfect Setup
After initial adjustments, observe your screen during gaming or high-contrast tasks. Take notes on ghosting visibility and eye comfort. Make incremental changes, like adjusting brightness levels or repositioning lights, until you find the minimal OLED smearing. My first setup was cluttered with too many cables and uneven lighting; refining the arrangement simplified my viewing experience and reduced persistent afterimages, transforming my gaming sessions.
Many believe that simply adding a desk lamp or a ring light automatically improves workspace ergonomics and visual comfort. However, this oversimplification ignores crucial nuances that can make or break your lighting setup. For instance, there’s a widespread myth that brighter lighting always equals better clarity. In reality, overly intense or poorly diffused light causes glare and eye strain, negating any perceived benefits. A study published in the *Journal of Environmental Psychology* emphasizes that optimal lighting isn’t about luminance but about appropriate brightness levels and color temperature tailored to your environment.
Let’s talk about color temperature. Many users assume that warm lights create a cozy atmosphere, but for workspace productivity and reducing OLED smearing, a neutral 6500K bias lighting is generally superior. This setting aligns with expert recommendations and helps in accurate color perception, which is essential for detailed tasks. Beware of low-quality LED lamps claiming to be “energy-efficient” without verifying CRI ratings. Using a low-CRI light can distort colors, causing visual fatigue over time. For guidance on choosing high-quality lamps, consult our comprehensive guide.
A common mistake is the misconception that ring lights are only for content creators or selfies. In fact, when properly positioned, they can eliminate harsh shadows on your face and improve overall visual clarity during calls. Yet, many users place their ring lights directly in front of their face, creating unflattering light and reflections on glasses. Optimal placement involves angling the light at around 45 degrees and maintaining a proper distance—about 24 inches—to avoid overexposure and glare. Check out our tips for perfect ring light setup.
### Are You Falling Into These Lighting Traps?
One insidious misconception is that underpowered or mismatched lighting enhances the ambiance and works for all tasks. In reality, mismatched color temperatures or inconsistent light distribution can cause headaches, eye fatigue, and reduced contrast, especially with OLED screens susceptible to smear artifacts. It’s essential to balance ambient, task, and accent lighting, considering both the intensity and the spectral qualities.
Finally, many underestimate the impact of proper light placement on preventing glare and reflections. Positioning your desk lamp and bias lighting at the right angles can prevent reflections that make OLED smearing more apparent. For advanced users seeking to refine their setup, exploring strategic placement techniques will elevate your workspace.
Remember, effective lighting isn’t just about adding more lights—it’s about understanding their interaction with your space, your monitor, and your eyes. Have you ever fallen into this trap? Let me know in the comments.Maintaining an effective lighting setup requires the right tools coupled with consistent attention. Personally, I rely on a few key pieces of equipment and software that ensure my workspace remains optimized for visual comfort and productivity. One essential element is a **lux meter** like the Extech LT300, which I use weekly to measure the luminance of my bias lighting and desk lamps, ensuring I stay within the recommended 10-15% of my display’s luminance for optimal contrast. This precise measurement helps prevent drift over time, which could compromise the setup’s effectiveness. Additionally, I utilize **smart home integration platforms** such as Philips Hue or LIFX, paired with their respective apps, to automate and fine-tune color temperature and brightness based on the time of day or task. For example, setting my bias lights to 6500K during daytime maximizes clarity, while shifting to warmer tones in the evening reduces eye strain—this dynamic adjustment keeps the setup aligned with circadian rhythms, as recommended by sleep research. To keep things running smoothly, I also schedule monthly check-ins using the lux meter to verify that my lights haven’t shifted in intensity due to bulb aging, which is a common issue that can undermine your setup over time. My approach is based on the understanding that consistent light quality directly influences visual health and working efficiency, and these tools help me stay on top of it. Looking ahead, I believe the trend toward smart, adaptive lighting solutions will expand, employing AI-driven sensors that can automatically calibrate brightness and color temperature in real-time, minimizing manual adjustments and maintaining optimal conditions effortlessly. If you want to ensure your workspace lighting stays effective long-term, I highly recommend investing in a decent lux meter and exploring smart lighting platforms to automate adjustments quickly. For detailed guidance on choosing and using these tools, visit https://lighting.techdeskessentials.com/led-lamp-innovations-brighten-your-desk-and-boost-productivity and try implementing sensor-based calibration to upgrade your setup today.
What the Hidden Truths About Lighting Taught Me
One of the biggest revelations was realizing that my assumptions about brightness and color temperature were holding me back. I used to think brighter lights meant better clarity, but I learned the hard way that overexposure creates glare, making OLED smearing more noticeable. A subtle, well-balanced bias lighting setup transformed my viewing experience, proving that moderation and proper placement are key.
Another lesson was understanding how reflections and shadows influence perceived ghosting artifacts. Adjusting my desk lamp angle and incorporating multiple light sources eliminated distracting glare and made ghost images less apparent. This taught me that intentional lighting design, rather than simply adding more lights, significantly impacts visual comfort and screen performance.
The third insight was the importance of consistency. Using tools like lux meters and automated smart lights helped maintain optimal luminance levels, preventing drift that could worsen OLED smear. Investing in precise measurement and automation tools turned my workspace into an environment tailored for high-performance display usage, not just aesthetics.
Tools and Resources That Changed My Approach
- Lux Meter (Extech LT300): Provided accurate measurements of my bias lighting, ensuring I stayed within optimal luminance ratios.
- Smart LED Controls (Philips Hue, LIFX): Enabled me to automate brightness and color temperature adjustments based on time of day, reducing eye strain during long sessions.
- Recommended Reading on Bias Lighting (Lighting Tech Desk): Their comprehensive guides offered insights into color temperature and placement, transforming my understanding of workspace lighting.
- Workspace Lighting Ideas (Recent Expert Articles): Studies and tips from industry leaders helped me refine my setup for maximum contrast and minimal smear artifacts.
Light the Path to Better Visual Comfort
Your workspace lighting can unlock a new level of display clarity and comfort. Whether you’re battling OLED ghosting or simply want to create an inviting environment, small adjustments lead to significant results. Don’t hesitate to experiment—your perfect setup is within reach. Start today, and let the light guide your way to an immersive, eye-friendly experience.
This post really resonated with me because I used to overlook how much workspace lighting impacts OLED performance. I had a tendency to keep my room dim for better immersion, but I found that this actually increased eye strain and made ghosting more noticeable. Since I started adding bias lighting behind my monitor, setting it to about 6500K and adjusting the brightness to match my screen, I noticed a significant reduction in afterimages during long gaming sessions. I also started using a lux meter to ensure consistent lighting levels, which helped me fine-tune my setup further. It’s fascinating how such seemingly small adjustments can make a big difference in both image clarity and eye comfort. Has anyone tried integrating smart lighting systems that automatically adjust based on ambient light or time of day? I’m curious if automation would make maintaining optimal lighting easier without constant manual tweaks.