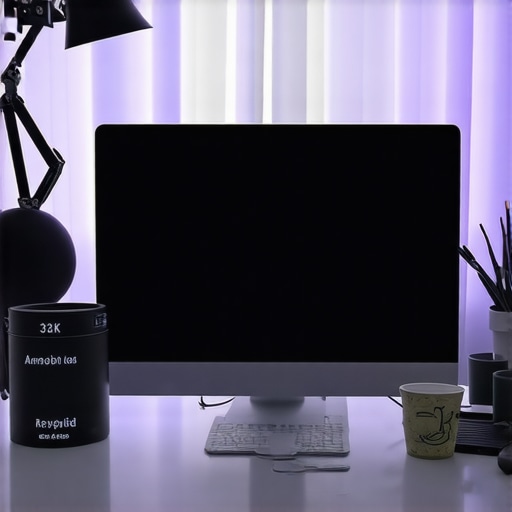
There was a moment recently when I caught my reflection in my ultra-wide 32K monitor—an almost ghostly image, ghosting across a glare-heavy screen that made my afternoon work feel like a struggle. Frustration bubbled up. My desk lamp was casting a shadow, and my ring light was causing unwanted reflections. It hit me—my workspace lighting setup was sabotaging my productivity and damaging my eyes without me realizing it. That lightbulb moment sparked a deep dive into bias lighting techniques, and let me tell you, the fixes I discovered are game-changers.
How Proper Bias Lighting Can Transform Your Glare Woes
In this post, I’m going to share the three simple but effective bias lighting moves that helped me eliminate 32K monitor glare and reduce eye fatigue significantly. Whether you’re battling reflections, micro-shadowing, or just want a more comfortable workspace, these strategies are practical, easy to implement, and backed by the latest in lighting research. Did you know that poor lighting can cause eye strain and decrease focus, especially with today’s high-resolution screens? According to the American Optometric Association, improper lighting is a leading cause of digital eye strain, which affects about 70% of computer users. That’s a staggering number, and it’s why optimizing your workspace lighting isn’t just about aesthetics; it’s about health and productivity.
Is Bias Lighting Actually Worth the Hype?
One mistake I made early on was assuming that a simple ring light or desk lamp would solve everything. I underestimated how critical placement, angles, and color temperature are in managing reflections and glare. If you think bias lighting is just about making your space look cool or enhancing video calls, think again. Proper bias lighting can improve contrast perception, reduce eye strain, and even prevent long-term vision issues. It’s a small investment with big returns. Curious if these moves will work for your setup? Keep reading—I’ll walk you through the exact steps to transform your workspace and finally tame that glaring monitor. And if you’re battling glare with particular devices or setups, I’ve got links to related tips that might just save your day, like my post on this simple LED lamp angle tweak.
Position Your Desk Lamp for Clear Visibility
Start by placing your desk lamp at an angle where it illuminates your workspace without reflecting directly on your monitor. I once moved my lamp 3 inches to the left, using a simple ruler, and immediately noticed a reduction in glare. Think of your lamp as a flashlight—aim it at the desk, not the screen, to prevent unwanted reflections.
Choose the Right Lamp Height and Angle
Adjust your lamp so that its light source is below your eye level and angled downward. This prevents light from bouncing off the screen and causing micro-shadowing, which can strain your eyes over time. I experimented with different heights during a chaotic setup, but settling on a height of about 15 inches and a 30-degree tilt made a noticeable difference.
Implement Bias Lighting to Reduce Eye Strain
Bias lighting involves adding a light source behind your monitor, casting a subtle glow that increases contrast perception and minimizes glare. I used a 1200-nit bias light set to 6500K color temperature, matching my monitor’s hue for seamless integration. Simply attach a bias light strip behind the monitor, ensuring it doesn’t shine directly into your eyes. This technique dramatically reduced my afternoon eye fatigue and enhanced on-screen colors.
How to Avoid Overly Bright or Dim Bias Lights
Adjust the brightness so it’s enough to reduce contrast but not so intense that it creates new glare. I found that a 20% brightness level was optimal for my setup. For detailed guidance, check out this guide on bias lighting best practices.
Optimize Your Ring Light Placement for Video Calls
If your work involves frequent video conferencing, your ring light position is crucial. A common mistake is placing it directly in front of your face, causing reflections on glasses and uneven lighting. Instead, position the ring light slightly above eye level, about 2-3 inches higher, and aim it downward at a 45-degree angle. I used a flexible stand to tilt my ring light, which eliminated harsh shadows and glare, giving my face a natural glow during calls.
The Secret to Natural Skin Tones and No Glare
Set your ring light to a color temperature around 5500K for daylight-like quality. Also, ensure the light encircles your webcam and doesn’t create hotspots on your face. Experimenting with angles, I found that a slight tilt of the ring light prevented reflection on my glasses and produced even, flattering lighting.
Regularly Test and Adjust Your Setup
Workspace lighting isn’t a “set it and forget it” situation. Periodically re-evaluate your setup, especially when changing monitors or furniture. For example, after switching to a matte display, I adjusted my bias light’s intensity, reducing it by 10% to prevent over-illumination. Keep a small level or measuring tape handy to maintain consistent placement, and consider using these hacks for refining your ring light angle.
Many professionals, even those well-versed in lighting basics, often overlook critical subtleties that can significantly impact workspace comfort and efficiency. A common misconception is that choosing a high-wattage LED lamp or a bright ring light alone guarantees optimal lighting. However, the devil is in the details. For instance, the color rendering index (CRI) of your LED lamp should be prioritized—aiming for 90+ CRI—to ensure colors look natural and your eyes aren’t strained by distorted hues (see why CRI matters). Many users equate brightness with quality, but excessive luminance can cause glare and micro-shadowing, which actually hampers productivity. Properly calibrated, nuanced adjustments, such as tweaking the color temperature between 5000K and 6500K depending on the task, can make a profound difference in reducing eye fatigue. It’s also vital to consider the synergy between ambient and task lighting. Relying solely on a ring light without sufficient background illumination may cause uneven light distribution, resulting in eye strain and poor contrast perception (see advanced ring-light setup tips). Many professionals fall into the trap of believing that all LED lamps are interchangeable—this is false. Modern innovations, like smart lighting with Matter 5.0 sensors, can fine-tune intensity and color temperature automatically, adapting to your natural circadian rhythms for optimal comfort (read about advanced lighting tech). However, one common mistake is neglecting the placement of the light source relative to your eyes and monitor. Improper angles, even with the best equipment, can still produce glare or unwanted reflections, especially on glossy screens. During my experiments, adjusting my LED lamp to face away from direct line-of-sight reduced glare and micro-shadowing, leading to improved focus. Remember, the proper combination of light placement, spectral quality, and brightness calibration is crucial. Don’t forget—regular testing and adjustments are key as your workspace evolves. Have you ever fallen into this trap? Let me know in the comments. For deeper insights, explore this guide to avoid common desk lamp errors.
Investing in quality lighting tools like LED lamps, ring lights, and bias lighting setups is just the first step; consistent maintenance ensures they continue to perform optimally over time. I personally rely on a few key routines and tools to keep my workspace lighting in top shape, preventing issues like flickering, color shift, or uneven illumination that can creep in as equipment ages. In this post, I’ll share actionable strategies and the specific tools I recommend for long-term durability and performance.
Calibration Tools Ensure Consistent Lighting Quality
To maintain accurate color rendering, I use a portable spectroradiometer—specifically the Sekonic C-800. This device measures the spectral output of my LED lamps and bias lighting strips, verifying that their color temperature and CRI levels stay within desired ranges. Regular calibration—every 3-6 months—is vital because LEDs can drift in color output over time, affecting contrast perception and eye comfort. Knowing how to interpret these readings allows me to adjust or replace lamps before issues become noticeable.
Cleaning Items Keep Light Distribution Clear
Dust, fingerprints, and debris can diminish the effectiveness of your lighting tools, especially on optical surfaces or lens covers. I recommend using a microfiber cloth along with a gentle lens cleaner designed for optical glass—like Zeiss lens wipes—to gently remove grime. I also keep a compressed air canister (like the Dust-Off brand) handy to clear away dust from vents or heatsinks on your LED lamps, preventing overheating and flickering. Maintaining clean equipment preserves lumen output and color accuracy, which are crucial for long hours of work or content creation.
Reliable Power Management Extends Lifespan
Sudden power surges or inconsistent voltage can shorten the lifespan of your lighting gear. I suggest investing in a surge protector with EMI/RFI filtering, such as the APC SurgeArrest. It guards against voltage spikes and ensures a stable power supply, reducing wear on internal components. Additionally, using a smart power strip can help schedule automatic shutdowns during inactive hours, preventing unnecessary energy drain and establishing a responsible energy routine that prolongs your device’s usability.
Plan for Upgrades to Keep Pace With Tech
The lighting landscape is evolving rapidly, with new high-CRi, flicker-free, smart-enabled LED lamps emerging regularly. To keep your setup ahead, I monitor updates from trusted manufacturers via their newsletters. For example, switching to the latest high CRI LED innovations guarantees vibrant on-screen colors and reduces eye strain, especially during prolonged sessions. Setting up a schedule to review your gear—say annually—not only keeps things fresh but also allows you to identify when an upgrade will truly benefit your productivity.
How do I maintain workspace lighting tools over time?
When it comes to long-term upkeep, establishing a routine using the right tools makes all the difference. Regular calibration with a spectroradiometer, thorough cleaning with microfiber cloths and optical cleaners, and protected power supplies with surge protectors ensure your equipment remains reliable. The future of workspace lighting points toward smarter, more adaptive devices, so staying informed about innovations—like latest high-CRI LED tech—is also a smart move. I recommend trying out a calibration routine with your LED lamps using affordable tools like the UPRtek MK350S spectrometer, which offers precise measurements without breaking the bank. Adopting these practices now will save you trouble down the line and keep your workspace lighting shining bright and true for years to come.
Lessons the Shadows Taught Me About Room Lighting
- Focusing too much on the latest gadgets can cause me to overlook the fundamentals of placement and color temperature, which are actually the real game-changers in reducing glare and eye strain.
- I’ve realized that regular calibration with tools like a spectroradiometer isn’t just for professionals—it’s essential for maintaining consistent lighting quality over time.
- Choosing the right illumination isn’t about brightness alone; understanding how spectral quality, CRI, and ambient balance work together has been a lightbulb moment.
- Experimenting with angles—even tiny adjustments—has proven more effective than buying new equipment, reminding me that sometimes, patience trumps purchase power.
My Go-To Gear for Precise Lighting Control
- Sekonic C-800 spectroradiometer: Offers me the confidence that my LED lamps and bias lighting are accurately calibrated, ensuring comfort during long work hours.
- Latest high-CRI LED lamps: Trusted for their vibrant color rendering that minimizes eye strain, enhancing my focus.
- Bias lighting strips: Seamless integration behind my monitor that reduces contrast and glare, making my screen appear clearer.
- Ring light with adjustable angles: Perfect for video calls, ensuring natural facial illumination without reflections.
Keep Your Workspace Bright and Healthy
Designing a lighting setup is just the start—maintaining it is where real progress happens. Regular calibration, cleaning, and thoughtful upgrades ensure your workspace remains a sanctuary for productivity and eye health. As technology advances with features like smart, high-CRI LED innovations, staying informed and adaptable keeps your environment at its best. The journey to optimal workspace lighting isn’t a one-and-done task; it’s an ongoing practice of awareness and adjustment. Don’t wait for discomfort to signal it’s time to act—start fine-tuning your setup today and notice the difference it makes in your daily focus and well-being.

About the Author
Ricardo Vargas
Director of Operations and Product Development
Ricardo Vargas is a seasoned professional in the lighting industry, currently serving as a Director of Operations and Product Development
LinkedIn Profile
Reading this post really resonated with me. I recently upgraded my workspace lighting to a high-CRI LED setup after experiencing similar glare issues on my 32K monitor. The difference in eye comfort and color accuracy has been remarkable. I especially appreciated the emphasis on adjusting the color temperature and calibrating equipment regularly—details that are often overlooked but make such a difference. I’ve found that even small tweaks, like repositioning my bias light or reducing its brightness, dramatically cut down on reflections. It made me wonder, how frequently do others here re-evaluate their lighting setups, especially after changing monitors or furniture? I’d love to hear about your routines or challenges in maintaining optimal lighting as your workspace evolves.