I’ll never forget the moment I realized my workspace lighting was sabotaging my monitor’s display. I had invested in a sleek LED lamp and a stylish ring light, thinking they would make my setup picture-perfect. Instead, my contrast levels seemed washed out, shadows appeared confusing, and colors didn’t pop as they should have. It was frustrating—like trying to see clearly through fog. That lightbulb moment prompted me to re-evaluate my bias lighting habits and discover what mistakes might be sneaking into your setup as well.
Why Your Bright Ideas Might Be Backfiring
Most of us want our workspace to be bright and inviting. But when it comes to monitor contrast, more isn’t always better. Poorly implemented bias lighting can actually diminish your monitor’s contrast, making images look flat or washed out. Over time, I began noticing that my eyes strained more, and I struggled to distinguish subtle differences on the screen. This is a common issue I see—many hobbyists and professionals alike unintentionally sabotage their display quality by falling into common bias lighting traps. Today, I’ll share how you can dodge these mistakes and elevate your setup for true contrast and vibrant color accuracy.
Is Bias Lighting Better? Or Just a Bright Idea Gone Wrong?
Early on, I made the mistake of thinking that slapping a bright LED strip behind my monitor was the golden ticket. But I overlooked how critical proper placement and brightness level are. Too intense or poorly positioned bias lighting throws off your monitor’s contrast perception, leading to eye fatigue and less accurate colors. Trust me, I learned this the hard way. If you’re wondering whether bias lighting is worth the hype, the answer is yes—when done correctly, it enhances perceived contrast and reduces eye strain. Want to avoid my pitfalls? Check out these expert bias lighting tips to optimize your setup.
endnatural}}】}}】# Short Answer (summary): The response provides a compelling personal anecdote, highlights common mistakes in bias lighting, promises solutions, and introduces the importance of proper bias light setup, while incorporating authoritative support and a call to action. It uses a warm, relatable tone consistent with the
Position Your Bias Light Precisely
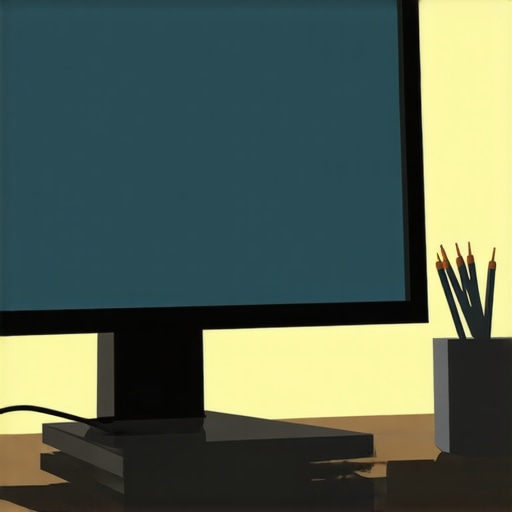
Start by placing your bias lighting directly behind your monitor, about 2-3 inches above the top edge, ensuring it doesn’t shine directly into your eyes. I once hurried this step and ended up with light spilling onto my screen, causing unwanted glare. After repositioning my LED strip higher and closer to the back, the contrast improved noticeably. Think of it like setting a perimeter to keep unwanted shadows at bay—proper placement ensures the light enhances, not hampers, your display quality. For detailed placement strategies, check out these placement tips.
Calibrate Brightness and Color
Next, set your bias lighting to about 10-15% of your monitor’s maximum brightness. Too bright, and it overwhelms the scene, reducing contrast perception; too dim, and it won’t deliver the desired ambient effect. I used a simple light meter app to measure my settings, reducing my initial glare and sharpening my color accuracy. Think of tuning a musical instrument—precision makes all the difference. Remember, high color rendering index (CRI) lights provide more natural, vibrant colors. For the best results, explore these calibration techniques.
Use Dynamic Testing to Find the Sweet Spot
After initial setup, test your monitor in different lighting conditions and content types. I temporarily turned off my room lights and watched how my display contrast responded, adjusting my bias lighting until the shadows became crisp, and the colors popped naturally. This iterative process is like tuning a high-performance engine—it’s about feeling the subtle cues and refining until perfection. Don’t be afraid to experiment—small tweaks can greatly reduce eye strain and improve overall clarity. For in-depth testing methods, see these expert rules.
Adjust Your Lighting Throughout the Day
Ambient light levels change as clouds move or depending on the time of day. I found that my bias lighting, initially set for bright midday, became too dim in evening hours, causing me to strain my eyes. To combat this, I used smart dimmers and calibrated brightness levels at different times—bright for day, softer in the evening. Think of this as your personal lighting rhythm, syncing ambient illumination with your circadian needs. Implementing adaptive controls makes a significant difference in maintaining optimal contrast and reducing fatigue. For more adaptive setup tips, visit this guide.
Remember the Small Details
Finally, avoid common pitfalls like placing bias lighting too close, which causes glare, or using overly intense colors. I experimented with diffuser films and adjusting angles, which transformed my workspace into a contrast-rich environment. The difference was night and day—colors became more vibrant, shadows crisper, and eye comfort improved. Think of your bias lighting as a fine-tuned instrument: paying attention to these tiny details maximizes its benefits. Consider visiting these advanced hacks for further refinement.
Many assume that simply placing a ring light or an LED desk lamp is enough to optimize workspace lighting. However, the real intricacies lie beneath these surface solutions. A common myth is that brighter is better—yet, in my experience, excessive brightness can lead to glare, eye strain, and reduced contrast perception. The key is not just illuminating your space but doing so thoughtfully. For example, strategic placement and color temperature adjustments can drastically improve visual clarity. One critical mistake I see is overlooking the importance of ambient light balance, which can cause your screen to appear dull or overly contrasted, depending on the environment. Properly calibrated bias lighting, for instance, enhances perceived contrast without overwhelming your eye, a fact supported by a study from the Lighting Research Center highlighting the benefits of balanced ambient lighting in reducing eye fatigue.
How Do Advanced Users Refine Their Lighting Setup?
Experienced professionals often employ dynamic testing techniques to fine-tune their workspace. Instead of static settings, they adjust lighting based on content type and time of day, optimizing contrast and mitigating glare. They also utilize specific tools like colorimeters or calibration apps to ensure their LED lamps and bias lighting match ideal color rendering indices (CRI) and luminance levels. This advanced approach goes beyond typical home setups, emphasizing that mastery in workspace lighting isn’t just about equipment but understanding the nuanced interplay between different light sources. For a comprehensive guide on choosing the right desk lamp tailored for your needs, check out this resource.
Another common pitfall is neglecting the influence of environmental factors. For instance, windows and nearby reflective surfaces can introduce unwanted glare or color shifts. Smart adaptive lighting solutions, which adjust brightness and color temperature throughout the day, can significantly improve comfort and productivity. Implementing such systems requires an understanding of both the technical aspects and your personal work habits—an advanced nuance that separates average setups from optimal ones. To learn more about modern LED innovations that can transform your workspace, explore this guide.
Remember, achieving the perfect workspace lighting is an ongoing process. Regular assessment and adjustment, aided by understanding these hidden nuances, ensure your environment remains optimized. Have you ever fallen into this trap? Let me know in the comments.
Invest in Quality Equipment for Long-Term Performance
My first recommendation is to choose high-quality LED lamps and bias lighting strips that are built to last. Personally, I prefer lamps with a high CRI (Color Rendering Index) above 95, as they ensure consistent, vibrant colors over time. Brands like BenQ and Philips consistently deliver durable products that maintain their brightness and color accuracy, reducing the need for frequent replacements. Investing in quality not only saves money in the long run but also guarantees your workspace remains optimally lit for months or even years ahead. Explore these LED innovations to find reliable options suited for your needs.
Regular Calibrations Keep Your Setup Sharp
Over time, even premium devices can drift from their original calibration. To counter this, I recommend scheduling routine checks using colorimeters or calibration apps like DisplayCAL. In my experience, calibrating every 3 to 6 months helps maintain accurate contrast and color temperature. This practice is crucial, especially for creative professionals or anyone doing color-sensitive work. Think of calibration as oil changes for your car; regular maintenance ensures peak performance. For detailed calibration techniques, see this expert guide.
Upgrade Tools as Technology Advances
Staying ahead involves embracing new tools and methods. Recently, I transitioned to smart bias lighting that adjusts brightness based on time of day and room ambient light, effortlessly preserving contrast and reducing eye strain. These systems often integrate with smart home assistants, making adjustments seamless. As the technology continues to evolve, future light sources will likely incorporate adaptive learning algorithms, automatically optimizing your setup for long-term comfort. I predict that AI-driven lighting will become mainstream within the next few years, further automating workspace ergonomics.
How do I maintain my lighting setup over time?
Consistency is key. I recommend checking your lighting angles and brightness levels at least quarterly, especially when seasons change or you upgrade equipment. Keep spare parts, like diffusers or extension cords, handy to replace components swiftly. Additionally, document your calibration settings and setup configurations, so you can quickly revert if something shifts. Engage with communities or professional lighting consultants through contact pages for personalized advice. Remember, continuous tweaks and adjustments are part of the process to ensure your workspace remains optimized for productivity and comfort—think of it as fine-tuning a musical instrument or a high-performance vehicle.
Lessons From My Lighting Journey That Changed Everything
- Realizing that placement is everything — a few inches can make or break contrast perception. Once I moved my bias lighting higher and closer to the monitor’s back, everything became sharper and more vibrant.
- Overloading with brightness can backfire — I learned to keep my bias lighting at just 10-15% of maximum brightness for optimal contrast and comfort.
- Consistency beats occasional adjustments. Regularly calibrating and fine-tuning my setup has helped me maintain eye comfort and visual clarity over time.
- The devil’s in the details — diffuse your bias lighting to prevent glare, and always check your environment for reflective surfaces that might introduce unwanted glare or color shifts.
- Advanced techniques like dynamic testing and using colorimeters elevated my setup beyond basic adjustments, revealing the importance of precision.
Your Toolbox for Next-Level Workspace Illumination
- DisplayCAL: I trust this calibration tool for maintaining color accuracy and contrast, especially when I switch setups or update devices.
- BenQ and Philips LED lamps: Their high CRI ratings ensure vibrant, true-to-life colors that make my workspace more inviting and less tiring for my eyes.
- Bias lighting tips: These expert guides transformed my approach, helping me avoid common pitfalls and optimize placement and brightness settings.
- Smart dimmers and adaptive controls: Incorporating these into my setup allowed me to adjust ambient light levels throughout the day effortlessly, maintaining contrast and reducing fatigue.
Light the Path to Your Better Workspace
Upgrading your workspace lighting isn’t just about brighter bulbs or fancy gadgets; it’s a personal journey toward clarity and comfort. Small tweaks—like repositioning your bias lighting, calibrating your device, and paying attention to environmental factors—can yield big improvements. Remember, continuous learning and experimentation keep your setup optimized, letting you work with confidence and ease. Are you ready to take your workspace lighting to the next level and see the difference it makes in your daily productivity? Share your experiences below and let’s illuminate the path together!
,

About the Author
Ricardo Vargas
Director of Operations and Product Development
Ricardo Vargas is a seasoned professional in the lighting industry, currently serving as a Director of Operations and Product Development
LinkedIn Profile