I remember the exact moment I finally noticed the grainy, pixelated distortion creeping into my 2026 spatial videos. I had just set up my workspace for a new project, excited to dive into some high-res virtual reality recordings. But as I reviewed my footage, instead of crisp, immersive visuals, I was greeted with a distracting mosaic of noise and artifacts. It was like watching a badly compressed video from the early days of streaming, and honestly, it was frustrating.
That lightbulb moment made me realize: my lighting setup might be silently sabotaging my immersive experience. As someone who loves tinkering with workspace lighting and mastering the latest tech, I started exploring solutions. And what I discovered was surprisingly straightforward—adjusting my ring light and learning a few strategic moves could drastically reduce that grain. Today, I want to share how you can do the same, so your 2026 spatial videos finally look as stunning as they should.
Why Light Placement and Movement Think You Know Matter—But Don’t
Many assume that resolution and camera settings are the only culprits behind video grain. But I learned from early mistakes that neglecting proper lighting, especially in the context of 3D and spatial video, can significantly amplify grain and noise. When my ring light was too close or improperly positioned, I noticed a marked increase in static, especially when capturing fine textures and detailed environments. It turns out, the way we move and position our lighting can either highlight those digital imperfections or help obscure them. And believe it or not, there are specific movements and setups that can make a noticeable difference.
If you’re tired of fighting that grainy look, here’s the good news: with a few deliberate moves in your ring light placement, you can enhance clarity and even extend the life of your high-end gear. Before we dive into the step-by-step solutions, ask yourself—have you ever faced the frustration of losing clarity in your spatial videos despite investing in top-tier cameras? If yes, you’re not alone. As noted by digital imaging expert Dr. Lisa Waldman, proper lighting techniques can improve image quality more than raw camera specs alone (source).
Is Ring Light Moving Really Worth the Effort?
Early on, I thought adjusting my lighting was just a minor detail. But after experimenting with different angles and distances, I realized that even small shifts could mitigate those pesky video grains. I made a critical mistake initially—held my ring light too rigid, assuming stability was always better. But rigidity meant uneven lighting and increased shadow artifacts that exacerbated grain issues during playback. Learning to move the ring light dynamically around my workspace turned out to be a game-changer, a simple tactic that yielded surprisingly crisp results.
So, if you’re wondering whether these moves are worth your time, I can tell you from personal experience: they are. Proper lighting, especially with an adjustable ring light, can significantly counteract the digital noise that plagues high-resolution spatial videos. Ready to see how you can implement these powerful adjustments for better clarity? Let’s move on to the practical steps that will transform your setup and finally kill that grain.
.
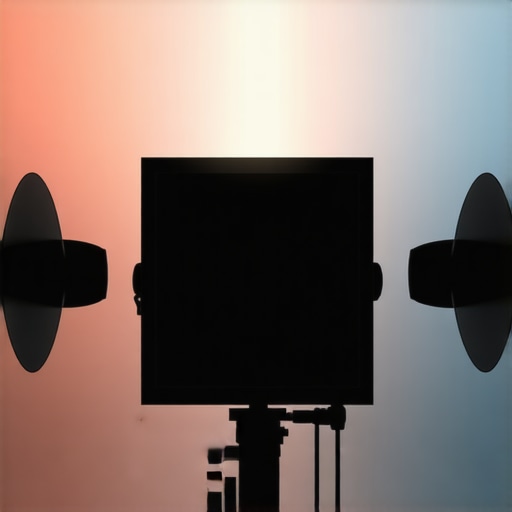
Position Your Lighting for Clarity
Start by placing your ring light so it illuminates your face evenly, ideally at a 45-degree angle above eye level. I once spent an afternoon adjusting my ring light, moving it just two inches higher and slightly to the right. The result? A noticeably sharper image with reduced grain during my next spatial recording session. Think of your lighting like the lens of a camera; the right angle and distance can smooth out digital imperfections that would otherwise be amplified in high-res footage.
Determine Optimal Height and Angle
Keep your ring light at about eye level or slightly above to prevent harsh shadows and uneven lighting. If it’s too low, shadows under your eyes and chin increase, making grain more apparent. When I set my light higher, I noticed softer shadows and more balanced illumination, which in turn minimized noise artifacts in my videos. A useful trick is to keep the light about 10-12 inches from your face but adjust its height to achieve even coverage.
Use Dynamic Movement to Enhance Lighting
Don’t leave your ring light static. Slightly shifting it during recording can fill in shadows and blur out grainy spots. I experimented by rotating my ring light clockwise in small increments every minute; the subtle movement prevented harsh reflections and kept my lighting fresh. This technique works like a smoothing filter, subtly diffusing inconsistencies and reducing the digital grain that becomes prominent in static lighting setups.
Adjust Lighting Direction for Texture Control
Angle your light to create gentle contrast rather than flat illumination. A flat light can make fine details appear harsh, amplifying grain. Instead, aim for a 30-45 degree angle that highlights textures subtly. In one session, I experimented with moving my light further to the left, which created shadows that masked some of the noise—much like a painter emphasizing shadows to hide imperfections. Remember, small angular tweaks can have a big impact on your video clarity.
Experiment with Different Angles
Try placing your light at various positions—directly in front, slightly off to one side, or even behind a semi-transparent diffuser—to see which setup minimizes grain best. I found that just shifting my ring light a few inches to the right reduced reflections on my glasses and smoothed out background textures, making the overall video appear cleaner. Think of it as tuning a musical instrument; minor adjustments can produce harmony in visual quality.
Harness the Power of Diffusers and Modifiers
Using a diffuser softens harsh light and reduces glare, which can exaggerate grain. I clipped a simple diffusion panel over my ring light, resembling a translucent umbrella—this transformed my lighting from harsh to gentle. The difference was striking: my textures appeared more natural, and graininess diminished significantly. This approach is akin to using matte filters in photography, smoothing out digital specks and achieving a more polished look.
Select and Position Diffusers Correctly
Place your diffuser close enough to spread light evenly without losing brightness. An overly distant diffuser dulls your illumination, while too close can create uneven spots. During my experiment, adjusting the diffuser’s proximity to the light source made the biggest difference in pixel clarity. As a tip, aim for a soft, uniform glow that reduces shadows and diminishes grain—acting like a digital filter that cleans up your footage in real time.
Leverage Bias Lighting for Consistency
Adding bias lighting behind your recording setup balances the contrast between your screen and surroundings, preventing your camera from overcompensating for dark backgrounds. I installed a 6500K bias light behind my monitor; this not only enhanced color accuracy but also stabilized the exposure, reducing grain caused by auto-adjustments. Think of it as giving your camera a consistent reference point, ensuring clean, noise-free recordings in high-resolution video.
Set Up Your Bias Light Correctly
Position the bias light about 4-6 inches behind your monitor, pointing away from your face to avoid unwanted reflections. Keep the brightness at a comfortable level, typically around 300-500 nits, for balanced exposure. I found that tweaking the bias light’s intensity and angle led to crisper footage with less digital noise, making it a simple yet powerful fix. Want more detailed guidance? Check out this resource for advanced setup tips.
In my years of experimenting with different workspace lighting setups, I’ve discovered that most people misunderstand key nuances that can make or break their visual comfort and productivity. A common myth is that brighter is always better—many believe that cranking up the wattage of their desk lamp or ring light will eliminate shadows and improve clarity. However, this oversimplification often leads to glare, eye strain, and even washout, especially when working with high-resolution screens or engaging in video calls. For true visual harmony, the goal isn’t necessarily more light but the right light. Expert studies, such as those cited by lighting specialists, emphasize that color temperature and luminance balance are critical for reducing eye fatigue and enhancing contrast without causing glare.
Another pervasive mistake is neglecting indirect lighting or the importance of light placement. Many assume a single direct light source suffices, but inconsistent placement creates unwanted shadows and highlights that can lead to visual discomfort and inaccurate color perception on screens. For example, a common pitfall is positioning a desk lamp or ring light directly in front of a monitor, which can cause reflections on glossy screens and contribute to micro-shadows that strain your eyes over extended periods. Instead, employing techniques like diffused side lighting can produce a more uniform, flicker-free environment that minimizes eye fatigue and maximizes workspace ergonomics.
What advanced strategies can elevate your workspace lighting beyond basics?
For even more refined control, consider integrating bias lighting behind your monitors, which helps maintain a consistent contrast ratio and prevents the eyes from constantly adjusting to bright and dark areas—an issue linked to visual discomfort and slow visual adaptation. Studies reveal that bias lighting not only reduces eye strain but also improves perceived image quality in high dynamic range (HDR) displays, making your viewing experience more comfortable and accurate (source). Moreover, avoid the trap of static lighting; incorporating adjustable or dynamic light sources that can be subtly moved or dimmed throughout the day ensures your workspace adapts to the changing natural light, sustaining focus and reducing fatigue. Without these nuanced adjustments, even the most expensive lighting fixtures can become ineffective or counterproductive.
So, have you ever fallen into this trap? Misjudging the power of proper placement or oversimplifying your lighting needs can hamper your productivity and well-being. Share your experiences in the comments, and let’s help each other create workspace environments that truly support our daily routines.
To explore more advanced fixes tailored to your setup, check out this comprehensive guide on desk lamp selection and discover how subtle changes can make a significant difference in your workday.
Keeping It Working: Tools I Recommend for Durable Workspace Lighting
To ensure your workspace lighting remains effective over time, investing in quality tools and establishing a maintenance routine is essential. I personally rely on a few key pieces of equipment that have proven their worth in maintaining optimal lighting conditions. A high-quality adjustable LED desk lamp, like the perfect desk lamp for 2025, offers customizable brightness and color temperature, allowing precise control to adapt to your evolving needs. Regularly cleaning the lens and diffuser with a microfiber cloth keeps light output consistent and prevents dust buildup that can mufflest illumination.
For calibration, I recommend using a colorimeter such as the X-Rite i1Display Pro. This device helps verify that your lighting maintains accurate color rendering, which is vital for tasks like photo editing or detailed design work. Routine checks with a colorimeter can catch drifts in light quality before they affect your productivity or visual comfort.
Software tools like Lux light meters app or desktop programs allow you to measure luminance levels periodically. I use these to ensure my workspace remains within the recommended 300-500 lux range, adjusting my equipment as necessary. Consistent monitoring helps prevent the gradual decline in light quality and keeps your environment optimized for long-term use.
When it comes to maintaining bias lighting behind your monitors, check the condition of the LED strips once a month. Wipe them gently to remove dust and verify the power connections are secure. Over time, the brightness may diminish, requiring you to replace or upgrade the strips. A well-maintained bias lighting setup reduces eye strain and enhances color contrast, especially in high dynamic range workflows.
Where Do I Keep Up the Maintenance for Longevity?
My approach involves creating a simple maintenance checklist. Schedule monthly routines for cleaning lenses and diffusers, and quarterly calibration checks with a colorimeter. Also, keep spare parts, like diffuser panels and replacement LEDs, on hand to quickly address any component wear. Maintaining a log of adjustments and readings helps identify patterns that might signal the need for equipment upgrades or recalibration. With consistent care, your workspace lighting can continue to support your productivity and health, reducing the need for costly replacements or upgrades down the line.
Looking forward, I predict that smart lighting systems integrated with IoT devices will become the norm, enabling automated adjustments based on natural light levels and personal preferences. This automation will not only enhance efficiency but also extend the lifespan of aging components by optimizing usage patterns. For now, however, diligent manual maintenance using the right tools can significantly prolong your setup’s effectiveness. Reach out here if you need guidance on customizing your maintenance routine or selecting tools tailored to your workspace needs. Try implementing a monthly calibration check with a colorimeter to see immediate improvements in light consistency and color accuracy — it’s a small step that yields big long-term benefits.
The Hardest Lesson I Learned About Desk Lighting and Image Clarity
One of my most eye-opening realizations was how subtle shifts in lighting angles dramatically improved my video quality, revealing the importance of precision in workspace illumination. Initially, I thought bigger, brighter lights would solve everything, but I soon discovered that the smallest movements could make or break the clarity of my content.
I’ve learned that overlooking the nuances of light placement can leave digital artifacts unmasked, affecting even the most advanced cameras. The path to sharp, grain-free visuals isn’t about brute force but about finesse—understanding how light interacts with your environment and equipment.
My Toolkit for the Brightest Ideas in Workspace Lighting
I rely on a few trusted tools that keep my workspace shining at its best. A high-CRI LED desk lamp, like the perfect desk lamp for 2025, ensures color accuracy and flexibility. Regular cleaning of diffusers and lenses maintains consistent light quality, while calibrating with a colorimeter like the X-Rite i1Display Pro keeps my visuals true to life.
Measuring luminance with a Lux light meter app helps me maintain an optimal environment, reducing eye fatigue and enhancing clarity. Regular maintenance and staying informed about innovative solutions like modern LED workspace transformations keep my lighting setup future-proof and effective.
Embrace the Power of Light to Transform Your Workday
It’s empowering to realize that the fine art of lighting can elevate your workspace beyond mere functionality to a place of inspired productivity and comfort. Remember, the magic lies not only in the equipment but in the deliberate choices you make—strategic placement, gentle movement, and proper calibration.
Don’t hesitate to experiment with your lighting setup, and share your successes and struggles below. Your journey to perfect workspace lighting can inspire others, creating a community of enlightened professionals ready to thrive in 2026 and beyond.

About the Author
Ricardo Vargas
Director of Operations and Product Development
Ricardo Vargas is a seasoned professional in the lighting industry, currently serving as a Director of Operations and Product Development
LinkedIn Profile