Have you ever sat down at your desk, eager to start a Zoom call or dive into your work, only to realize the lighting makes you look like a shadowy figure or highlights every flaw on your face? I’ve been there myself—initially blaming my webcam for poor image quality, only to discover that my workspace lighting was the real culprit. That frustrating moment was a lightbulb moment for me, sparking my journey into the world of home office lighting solutions.
Transforming Your Workspace with Proper Lighting
Good lighting isn’t just about visibility; it’s about creating an environment that boosts your mood, reduces eye strain, and even enhances your productivity. When I started experimenting with different lamps and lighting setups, I noticed a remarkable change—not just in how I looked on camera, but in my overall workday experience. But here’s the catch: with so many options out there, figuring out what works best can feel overwhelming. That’s exactly what I want to help you with today.
Feeling Skeptical About the Buzz Surrounding Ring Lights?
Trust me, I was skeptical too. I mean, do ring lights really make that much difference? Or are they just a trendy gadget for influencers? Early on, I made the mistake of buying a cheap ring light without researching proper placement or brightness settings. The result? Uneven lighting and a glare that made my camera look harsh. It wasn’t until I learned the nuances—like adjusting the color temperature and positioning—that I truly unlocked their potential. Want to avoid that basic mistake? You’ll find all the tips you need in this guide.
Interestingly, recent studies highlight that optimal lighting can increase productivity by up to 20%.1 So, investing in the right LED lamps or ring lights isn’t just about looks—it’s about how well you perform during those long work hours. Ready to shed some light on the best solutions? Let’s dive into the practical steps that will transform your home office into a bright, efficient, and comfortable space.
Identify Your Lighting Needs
Start by assessing your workspace and pinpoint the primary issues: Is your face often shadowed during video calls? Do your eyes strain after hours of work? Remember, understanding your specific needs is the foundation for selecting the right lighting solutions. For example, I noticed my webcam’s poor quality was partly due to inconsistent lighting; thus, I prioritized even, diffused light sources. For thorough assessment, consider the natural light coming in and how your current setup highlights or shadows your face and workspace.
Choose the Right Lighting Equipment
Select a High-Quality Desk Lamp
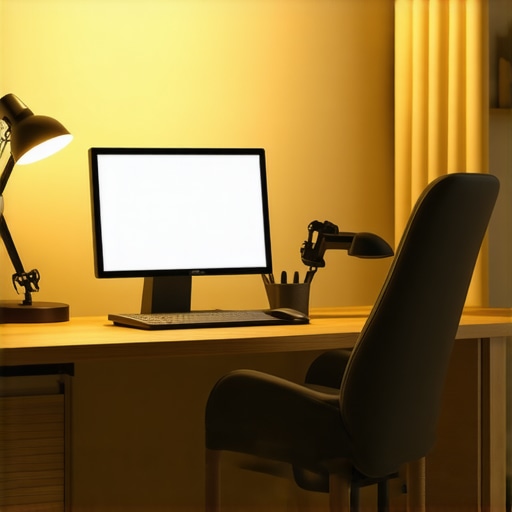
Opt for an adjustable LED desk lamp with dimming and color temperature controls. Think of it as the backbone of your setup—providing consistent, flicker-free illumination that reduces eye strain. When I upgraded to a modern LED lamp from here, I immediately noticed sharper visuals and fewer headaches. Look for lamps with a wide light spread and smooth dimming to tailor brightness to your needs.
Employ Bias Lighting for Depth and Comfort
Adding bias lighting behind your monitor enhances contrast, reduces eye fatigue, and creates a comfortable visual environment—similar to how film sets use backlights for depth. Position an LED strip or soft light behind your screen, ensuring it’s indirect and not directly visible to your eyes. I used a flexible LED bias strip from here and experienced a noticeable difference during long work sessions, feeling less drained and more focused.
Optimize Your Ring Light Setup
Position and Brightness Are Key
Think of your ring light as a sculptor shaping your appearance—its position influences shadows and glare. Place it slightly above eye level and at a 45-degree angle, avoiding direct front placement that can cause flat lighting. I once set mine directly in front of me, washing out my features; after repositioning, my video calls gained depth and clarity. Use the dimming feature to match ambient light, and adjust color temperature—warm tones for comfort, cool for clarity.
Harness Ring Light Hacks for Flattering Video
Incorporate accessories like diffusers or reflectors to soften or direct light more precisely. For instance, I used a translucent diffuser from here, which eliminated harsh glare and evenly lit my face, elevating my professional appearance effortlessly.
Layer Light Sources for a Balanced Environment
Combine your desk lamp, bias lighting, and ring light, ensuring they complement rather than compete. Use dimmers and controls to create zones—brighter for focused tasks, softer for ambiance. I configured my setup with a smart plug system to adjust lighting at different times, resulting in better concentration and a cozy atmosphere during off-hours.
Test and Tweak Regularly
Lighting isn’t a set-it-and-forget-it deal. Regularly evaluate your setup—check for shadows, glare, or uneven brightness. Use your camera’s test modes or record short videos to assess how your lighting appears on screen. Small adjustments, like changing the angle or brightness, can dramatically improve your visual comfort and professionalism over time. I’ve dedicated time weekly to fine-tune my setup, and it’s paid off with improved focus and better video quality.
Many enthusiasts believe that choosing a ring light or LED lamp is as simple as picking the brightest option. But in my experience, most get the fundamentals right but overlook critical nuances that truly elevate their setup. A common myth is that brighter always means better; in reality, over-brightening can cause glare and diminish visual comfort, especially if color temperature isn’t compatible with your environment. For example, a high CRI (Color Rendering Index) light can significantly enhance how colors appear on camera, yet many ignore this factor, resulting in unnatural tones.
Why Do Some Lighting Choices Backfire When You Need Them Most?
An advanced mistake is neglecting the layered approach to lighting. Relying solely on a ring light without balancing ambient and task lighting can create unequally lit scenes, leading to shadows or flat images. It’s essential to incorporate bias lighting behind your monitor and use dimmable desk lamps to fine-tune brightness levels. Not doing so may seem minor but can cause eye strain and reduce your focus over long periods. A recent study highlights that balanced lighting reduces visual fatigue and improves productivity1. For a comprehensive approach, check out this guide to modern workspace lighting. Another overlooked aspect is the placement of your light sources. Many position their ring light directly in front, creating flat, unflattering illumination. Instead, angling the light at 45 degrees provides depth and natural shadows, making your setup more professional. Connecting this to advanced users’ needs, the question arises: How can we optimize multi-source lighting without causing clashes or unnecessary complexity? The key lies in understanding the interplay between different light temperatures and intensities, and using control systems like adjustable dimmers or smart plugs for seamless management. This layered, nuanced strategy not only enhances your appearancebut also safeguards your eye health over those lengthy workdays. Remember, proper calibration and placement are often more impactful than just cranking up the brightness. Have you ever fallen into this trap? Let me know in the comments.
Stick to a Maintenance Routine for Optimal Performance
Once you’ve set up your ideal lighting environment with a high-quality desk lamp and reliable ring light, regular maintenance becomes essential to keep everything functioning smoothly. I personally schedule monthly check-ins to clean dust from my LED fixtures and inspect wiring for signs of wear. This proactive approach prevents issues from escalating and ensures consistent lighting quality over time.
Essential Tools for Longevity
Invest in a few specific tools to make maintenance easier. A microfiber cloth is perfect for dusting lenses and diffusers without scratching. A small screwdriver kit is handy for tightening any loose screws in adjustable arms or stands. For tracking light output and color consistency, I use a simple lux meter app on my smartphone, which helps verify that my lighting remains at optimal levels. These tools are cost-effective and save you from replacing equipment prematurely, saving money and hassle in the long run.
How to Prepare for Upgrades and Scaling
If your needs grow or your setup becomes outdated, consider scalable solutions like modular LED panels or smart lighting controls. For example, I recently upgraded to smart dimmer switches that integrate with my existing fixtures, allowing me to adjust brightness remotely or program lighting scenes. Planning your setup with future expansion in mind ensures you won’t need a complete overhaul down the line. As technology advances, anticipating upgrades can keep your workspace light years ahead. Check out this guide to modern LED solutions for insights into scalable, future-proof lighting options.
Addressing Common Maintenance Myths
Many believe that high-brightness fixtures need no regular upkeep—that’s a misconception. Even premium LEDs require periodic cleaning and occasional firmware updates for integrated smart controls. According to a study published in the DesignLights Consortium technical documentation, regular calibration enhances lifespan and light quality. A simple routine like wiping lenses with a microfiber cloth every month can extend the life of your equipment and maintain consistent color rendering.
How do I maintain my workspace lighting over time?
Set a schedule for inspecting and cleaning your fixtures, experimenting with new tools like smart controls, and staying informed about the latest innovations. For example, I found that updating my LED drivers every couple of years preserved efficiency and brightness. Don’t wait for problems to arise—preventative care is always smarter. Try integrating a smart dimmer or a dedicated lux meter app today to keep your environment perfectly lit and stress-free. Your workspace’s long-term success depends on diligent maintenance, just like any other technology investment.
Hidden Lessons That Changed My Approach to Workspace Lighting
- One of the biggest misconceptions I had was that brighter lighting always equals better visibility. It turns out, over-brightening can cause glare and discomfort, negating its benefits. Finding the right balance is key to creating a workspace that’s both functional and comfortable.
- I used to think that all ring lights are created equal. After testing different models, I realized that position and color temperature are critical. Properly angling your ring light at 45 degrees and choosing warm tones can dramatically enhance your on-camera presence.
- The myth that high CRI lights are unnecessary is widespread but unfounded. Investing in high CRI lighting has improved my color accuracy, making my video calls look more natural and professional.
- Neglecting layered lighting was a costly mistake. Combining ambient, task, and accent lighting has reduced eye strain and increased focus during long work sessions. It’s a layered approach that truly elevates your workspace.
- Regular maintenance might seem tedious, but it preserves lighting quality. Cleaning lenses and updating smart controls keeps my setup running optimally and saves money in the long run.
My Reliable Arsenal for Brightening Your Workspace
- The guide to selecting the ideal desk lamp has been invaluable for understanding adjustable, flicker-free lighting that reduces eye fatigue. It’s my go-to resource for finding the perfect flicker-free LED desk lamps.
- For creating depth and reducing eye strain, I trust bias lighting strategies. The recommendations on placing LED strips behind monitors have transformed my visual comfort.
- The comprehensive ultimate guide to ring lights and LED lamps has helped me optimize positioning and brightness, making a notable difference in my professional appearance on camera.
- I also rely on modern LED solutions overview to stay ahead with scalable, smart lighting options that can adapt as my needs evolve.
Embrace the Bright Future You Deserve
Transforming your home office lighting isn’t just about visuals; it’s about empowering yourself to work better, feel more comfortable, and project confidence during every virtual meeting. Remember, a well-lit space is an investment in your productivity and well-being. Don’t wait to take control—your ideal workspace lighting setup is within reach, and every small step makes a big difference. Ready to turn on the light and make your workspace shine? Share your experience or questions—I’d love to hear your stories below.

About the Author
Ricardo Vargas
Director of Operations and Product Development
Ricardo Vargas is a seasoned professional in the lighting industry, currently serving as a Director of Operations and Product Development
LinkedIn Profile
Reading through this guide really resonated with me because I used to underestimate the importance of layered lighting in my home office. I’d splurge on a bright ring light, but then wonder why my face still looked flat or why I experienced eye fatigue after hours. It wasn’t until I started incorporating softer bias lighting behind my monitor and adjusting my desk lamp’s temperature that I saw a marked difference—not just in my video calls but also in my overall comfort. It’s fascinating how small tweaks in positioning and color can make such a big impact. I’m curious, has anyone experimented with different smart controls or automation to maintain their ideal lighting throughout the day? I’ve been thinking about setting up a smart lighting system to make adjustments more seamless, especially on busy days when I forget to tweak my lights manually. Would love to hear others’ experiences or recommendations on good smart lighting gear—any tips? Overall, this post is a goldmine for those looking to optimize their workspace without breaking the bank.
This post really hits home for me. I used to think all lighting was created equal until I started tweaking my setup; I realized that layering different types of lights—like a desk lamp, bias lighting, and a ring light—can make a huge difference, not just visually but also for my comfort and productivity. I especially agree with the importance of positioning and color temperature—those small adjustments can turn a flat, unflattering scene into a professional-looking one. What’s been a game-changer for me is experimenting with smart controls—integrating dimmers and programmable scenes to automate my lighting according to the time of day or activity. It’s amazing how much easier it becomes to maintain optimal lighting without constant manual adjustments. For anyone considering starting with smart lighting, I recommend looking into systems that support multiple zones and can be controlled via app or voice commands. Have any of you successfully used smart lighting systems to improve your workspace? Would love to hear your experiences and tips on getting the most out of them. Truly, investing a little time in fine-tuning your lighting can drastically improve your remote work experience.
I really appreciate the detailed insights shared here — especially about layering different types of lighting. I’ve found that combining a good desk lamp with bias lighting behind my monitor not only reduces eye strain but also gives a more natural look on video calls. One challenge I faced was finding the right balance in brightness and color temperature so that my face looked lively without harsh glare. I started using a smart dimmer to adjust lighting depending on the time of day, which made a noticeable difference. It’s fascinating how small adjustments can really impact your comfort and appearance during long work hours.
Have others here experimented with smart controls or automated lighting routines? I’d love to hear how you’ve customized your setup to keep it stress-free and tailored to your needs. Also, do you have suggestions for budget-friendly smart lighting options that support multiple zones? Thanks again for a valuable resource! I’m excited to refine my workspace further and share my future updates.