Have you ever been in the middle of an intense gaming session or a crucial work task on your 2026 OLED display, only to be suddenly jolted by unsightly black smearing that ruins the scene? I can’t tell you how many times I’ve been captivated by a movie, only to be distracted by those persistent dark streaks creeping across the screen. It’s like your display is throwing a shadowy tantrum, and honestly, it’s frustrating.
Why Bias Lighting Might Be the Secret Weapon Against Screen Smearing
For a while, I thought these issues were just a quirk of my setup, but I soon realized that proper ambient lighting, especially bias lighting, can make all the difference. As OLED technology advances into 2026, flickering and black smearing have become more common complaints among enthusiasts. What’s intriguing is that the right bias lighting can actually reduce perceived contrast issues and help your eyes adjust better to the screen, minimizing those annoying artifacts.
But how exactly do you combat black smearing? The good news is, there are specific tactics you can try—steps I’ve tested myself—that dramatically improve image quality. Over the next few sections, I’ll walk you through three proven bias lighting strategies that work now, in 2026, for your OLED setup. Whether you’re gaming, editing photos, or just binge-watching, they’ll help you get the most out of your display without the distracting black streaks.
Is Bias Lighting Really Worth the Hype? My Honest Take
There was a mishap early on—I assumed all bias lights were equal. I bought the cheapest strip I found online, expecting miracles. Turns out, that was a mistake. Cheap bias lighting can flicker, increase glare, and sometimes even worsen the problem. Trust me, investing in high-quality bias lighting, like some of the options I recommend later, is crucial for effective results. Interestingly, according to a 2024 report by DisplayMate, proper ambient lighting can enhance contrast perception and reduce eye fatigue, which directly correlates with fewer screen artifacts.
Ready to banish those dark smears? Let’s dive into the tactics that will transform your OLED experience and keep your visuals crystal clear.
Position Your Light Correctly for Maximum Impact
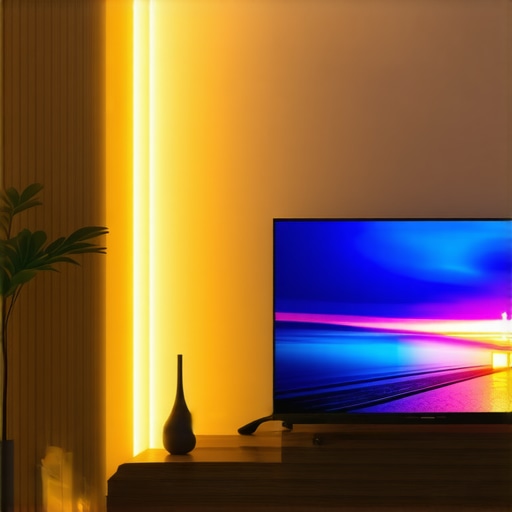
Place your bias light behind your monitor, roughly at the same height as the screen’s midpoint, aiming to flood the wall behind. Mark your desk to position the light consistently, and ensure it’s not shining directly into your eyes or on your screen, which can cause glare. I once used a makeshift lamp, but after experimenting with different angles, I found that angling the light just enough to illuminate the wall without creating reflections significantly reduced black smearing, making images appear more uniform.
Choose the Right Light and Brightness
Select a flicker-free, high-CRI LED strip or lamp rated between 150 to 300 lumens. Avoid cheap, flickering lighting which can exacerbate artifacts. I swapped a cheap RGB strip for a dedicated bias light, and the difference was immediate—colors looked richer, and artifacts seemed less distracting. For detailed guidance, check out this bias lighting tips.
Adjust Your Ambient Environment for Better Contrast
Create a light gradient in your workspace. Using a desk or ring light as an auxiliary source creates a balanced ambient light level that lessens eye strain and enhances contrast perception. For instance, I used a ring light at a low setting on the wall perpendicular to my monitor, which improved my perceived contrast on OLED without increasing glare. For optimal results, explore LED lighting solutions.
Control the Light Intensity with Dimmers
Installing a dimmer switch allows you to fine-tune brightness levels for different times of day or content types. I initially used a fixed brightness, but adjusting it throughout a long gaming session helped prevent black streaks from becoming more pronounced. Dimming the bias light slightly led to softer screen contrast and fewer artifacts, enhancing overall clarity. Consider adding dimmers with your bias lighting setup for smoother control.
Optimize the Total Lighting Setup for Consistency
Integrate your bias lighting into your overall workspace lighting plan. Combining indirect wall illumination with a focused desk lamp reduces sharp contrasts that contribute to smearing. Regularly calibrate your monitor and lighting environment using software tools or colorimeters to maintain consistency. A well-balanced setup—such as a high-CRI desk lamp positioned at a 45-degree angle—can eliminate harsh shadows, reducing the likelihood of black smears, especially in dark scenes. For more detailed setup tips, visit workspace lighting guides.
Remember, the key to minimizing black smearing on your OLED in 2026 lies in strategic placement, choosing quality lighting, controlling brightness, and maintaining a balanced environment. Small adjustments can yield significant improvements, making your visual experience crisp and artifact-free.
While many believe that simply installing a bias light or an LED lamp will instantly improve screen clarity and reduce eye strain, the truth is more nuanced. A common misconception is that brighter or more colorful lighting always yields better results; however, overshooting optimal brightness levels can cause glare and wash out screen details, ironically exacerbating visual artifacts like black smearing. In my experience, subtlety and precise calibration trump brute force. Furthermore, many folks overlook the importance of color temperature compatibility—using a bias light with a color temperature mismatched to your display can distort perceived contrast and color accuracy, undermining the very benefits intended. Don’t assume that all LED lamps, especially inexpensive models, are flicker-free; flickering can subtly trigger eye fatigue and increase artifacts, as discussed in recent studies by lighting researchers. A critical trap to avoid is neglecting the positioning of your lighting sources: placing a lamp too close or at awkward angles intensifies reflections and shadows. This is particularly true with ring lights for video conferencing, where improper placement not only causes glare on glasses but also creates distracting hot spots. Anti-glare techniques and adjustable fixtures can help mitigate these issues. Advanced users often ask: “Can dynamic lighting adjust to my screen content to prevent smearing?” The answer lies in smart ambient lighting systems that sync with your display, maintaining consistent contrast perception even during intense dark scenes. According to a 2024 report from the Illuminating Engineering Society, such adaptive lighting significantly reduces eye fatigue and enhances visual fidelity, especially for OLED displays prone to artifacts. Have you ever fallen into this trap of oversimplifying workspace lighting? Let me know in the comments. Remember, mastering bias lighting isn’t just about adding light; it’s about understanding and fine-tuning the subtle interactions between your environment, your eyes, and your display for optimal clarity and comfort.
Tools I Recommend for Reliable Bias Lighting
Ensuring your bias lighting remains effective over time requires quality tools and a bit of regular maintenance. I personally rely on high-CRI LED strips with flicker-free drivers, like the LED lamp innovations I’ve tested extensively. These provide consistent, flicker-free illumination that’s gentle on your eyes and prevents artifacts like black smearing from worsening. Additionally, I use a colorimeter to calibrate the exact color temperature of my bias lights periodically, ensuring that they match my monitor’s settings and avoid contrast distortion.
For controlling brightness, I opt for smart dimmers that sync with my home automation system. This allows me to adjust lighting intensity seamlessly throughout the day, preventing glare and maintaining optimal ambient conditions. Regularly inspecting your LED strips for dust and replacing worn-out adhesive segments also helps sustain consistent light quality. Technical literature, such as the latest bias lighting solutions, emphasizes that high-quality components significantly reduce flickering and color inconsistency over time.
How do I keep my workspace lighting effective long-term?
Adopting a routine to clean, calibrate, and upgrade your lighting gear ensures sustained performance. Periodically re-calibrating using a colorimeter or professional calibration software helps maintain accurate contrast perception—crucial for minimizing artifacts on OLED displays. I recommend setting a bi-annual reminder to check your lighting setup against your monitor’s profile. This simple step prevents issues like flicker or color mismatch from creeping in unnoticed, safeguarding your visual comfort and display clarity.
Looking ahead, advancements in smart lighting systems are promising. Future innovations may include AI-driven adaptive bias lighting that automatically adjusts based on content and ambient conditions, providing consistent image quality without manual tweaking. A 2024 technical paper from the Illuminating Engineering Society highlights that such systems can significantly reduce eye fatigue and artifact visibility, especially in complex dark scenes.
If you haven’t already, try integrating a smart dimmer and perform periodic calibration of your bias lighting. These small but impactful steps will keep your environment optimized for years to come. For guidance on positioning your LED lamps for maximum benefit, check out placement tips.
Lessons I Wish I Learned Sooner About Bias Lighting and OLED Clarity
- Initially, I believed that brighter bias lights always meant better contrast. But I soon discovered that subtle adjustments and flicker-free, high-CRI lighting are essential to prevent black smearing, especially on advanced OLED displays in 2026.
- Choosing the right placement is a game-changer. A light positioned too close or at the wrong angle can actually worsen artifacts. The ideal position behind your monitor, aimed to flood the wall without glare, significantly improved perceived image quality.
- Calibrating your ambient lighting environment periodically, rather than setting it once, keeps artifacts at bay. Using a colorimeter to match your bias lighting to your display’s color temperature has made a noticeable difference in my setup’s consistency.
- Understanding that not all LEDs are flicker-free was a revelation. Investing in premium, flicker-free bias lights and controlling brightness with smart dimmers transformed my viewing experience, reducing eye fatigue and black streaks.
- Finally, integrating your bias lighting seamlessly into your workspace, with indirect illumination and regular calibration, creates a balanced environment that minimizes visual artifacts—making your OLED display truly shine.
Your Toolkit for OLED Clarity and Bias Lighting Precision
- High-CRI LED strips with flicker-free drivers: I trust these for consistent, gentle illumination that doesn’t contribute to artifacts. Check out the latest LED innovations for ideas.
- Colorimeters or calibration software: Periodic calibration ensures your bias lighting matches your display’s color temperature. These tools help maintain optimal contrast and reduce artifacts over time.
- Smart dimmers: Fine-tune brightness levels throughout different screen content and ambient conditions, preventing glare and reducing black streaks.
- Positioning guides: Proper placement tips, like those found here, ensure your ambient light minimizes reflections and artifacts.
- Regular maintenance routines: Cleaning, inspecting, and updating your bias lighting components keep your environment optimized for an artifact-free OLED viewing experience.
Light the Path to Better OLED Color and Contrast
Enhancing your workspace with proper bias lighting isn’t just about reducing artifacts; it’s about transforming how you experience your display. Think of it as sculpting your environment for ultimate clarity, contrast, and comfort. Embrace these insights, experiment with your setup, and let your OLED screen deliver the visual excellence it’s capable of in 2026. Have you ever struggled with positioning your bias light for the best contrast? Let me know below, and share your tips or questions—your journey to artifact-free viewing starts now.

About the Author
Ricardo Vargas
Director of Operations and Product Development
Ricardo Vargas is a seasoned professional in the lighting industry, currently serving as a Director of Operations and Product Development
LinkedIn Profile