It was a typical Tuesday morning when I finally looked up from my cluttered desk and caught a glimpse of myself during a video call—something I do dozens of times a week. To my horror, I realized my ring light was glaring down at an awkward angle, casting unflattering shadows and making me look like I’d just woken up. That moment, I felt an unfamiliar wave of frustration. How could something as simple as the height of my ring light ruin my professional image?
Why Ring Light Positioning Is a Game-Changer for Clear, Natural Calls
Since that day, I’ve been on a mission to understand how to fix the height of ring lights for better visual outcomes. The truth is, many of us overlook this simple adjustment, yet it can dramatically improve the quality of our video presence. Think about it—when lighting is uneven or poorly positioned, our faces appear dull or washed out, and minor imperfections are exaggerated. In contrast, the right height can soften shadows, highlight your best features, and create a more authentic, approachable look. And in an era where virtual meetings are integral, ensuring you look your best isn’t just vanity—it’s about professionalism and confidence.
Research from the American Lighting Association emphasizes how proper lighting setup can enhance facial visibility and reduce eye strain during prolonged computer use, which means better comfort and focus during those all-day meetings. If you’ve ever faced the frustration of trying to fix your lighting with trial-and-error adjustments, you’re not alone. Early on, I made the mistake of just tilting my ring light or stacking books underneath, but that often led to inconsistent lighting and even more frustration.
Today, I promise to share straightforward, tested strategies that will help you position your ring light at the perfect height for more natural, professional-looking calls. Ready to finally get rid of that awkward glare and shadow? Let’s dive into the practical steps that will make your virtual meetings look a lot better—and a lot more confident.
Is Adjusting Your Ring Light Height Worth All the Fuss?
Truthfully, I used to think small tweaks didn’t make much difference. However, I quickly learned that a minor adjustment—like raising or lowering your ring light—can be the difference between looking tired and looking confident. One mistake I made early on was ignoring the angle of the light, focusing only on brightness levels, which left me with uneven lighting. Since then, I’ve discovered that optimal height and angle are key to natural, flattering illumination.
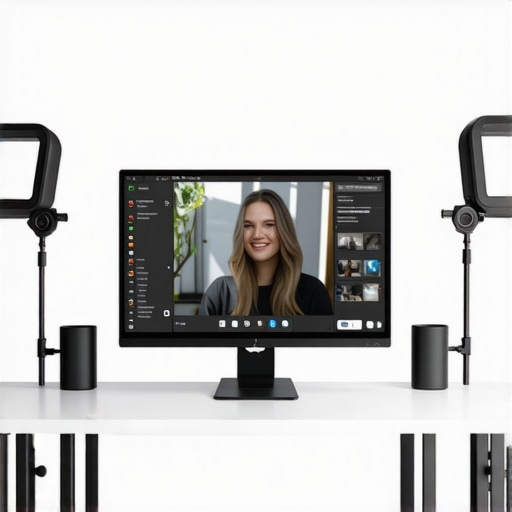
Position Your Ring Light Correctly
Start by setting up your ring light at eye level. Use a sturdy tripod or adjustable stand—many models quickly adjust from 20 to 50 inches. I once struggled with makeshift solutions, stacking books under my light, which resulted in uneven illumination and a wobbling setup. Now, I prefer a dedicated stand that allows fine-tuning. Adjust the height so that the ring is centered directly in front of your face, about 2-3 inches above your eye line, to minimize shadows and prevent glare on glasses.
Use Your Camera as a Guide
Place your webcam or laptop at your usual eye level and sit naturally. Then, set the ring light height so that, when you look at the camera, your face is evenly lit and the light encircles your eyes. This alignment reduces shadows and creates a natural, flattering glow. I used to overlook this, and my face was often shadowed or washed out—until I aligned the light with my camera’s position. For more workspace setup tips, see this comprehensive workspace lighting guide.
Adjust the Light Angle and Distance
Once the height is set, tilt the ring slightly downward—about 10-15 degrees—to avoid harsh light hitting your forehead. The distance from your face influences brightness; typically, keeping the light about 18-24 inches away provides a soft, even glow. Too close, and you risk overexposure or glare; too far, and the light becomes weak. I initially placed my ring light too close, causing flickering and harsh shadows, but moving it back improved the softness of my face and reduced eye strain.
Fine-Tune for Even Illumination
Use the dimmer control to match your ambient lighting. Turn down the brightness if your room has lots of windows or other light sources to prevent overexposure. For a natural look, avoid lighting that’s too intense or flat. In my experience, small adjustments—like dimming slightly—made a noticeable difference in how balanced my face appeared on video. For additional tips on integrating bias lighting, check bias lighting enhancements.
Test Your Setup During a Call
Finally, test your arrangement in a video call. Adjust the height and angle while observing your on-screen appearance. Ask a trusted colleague or record a quick video to evaluate the lighting. I learned this the hard way when my initial setup looked fine in the mirror but appeared dull on camera. Adjustments that optimize the angle and height make your presence more professional and approachable. If you want to avoid common lighting pitfalls, review this ring light hacking guide.
When it comes to creating an effective workspace, many people rely on popular advice that might be misguided. One pervasive myth is that brighter is always better; however, excessive illumination can lead to glare and eye strain, especially if your desk lamp or LED lighting isn’t properly calibrated. In fact, studies from lighting experts recommend balancing ambient and task lighting to reduce fatigue and improve focus. For example, installing bias lighting behind monitors can enhance contrast and reduce eye discomfort, but only if it’s positioned correctly to avoid adding unwanted reflections or glare. Many assume that all LED lamps are identical in quality, but variations in CRI (Color Rendering Index) significantly impact color accuracy and visual comfort—an aspect often overlooked in budget lighting solutions. Advanced users should consider the nuanced differences in LED technology to optimize their workspace, rather than settling for the most noticeable features.
Another common mistake involves the placement of ring lights or desk lamps. Positioning a ring light directly in front of your face may seem intuitive, but it can create flat, unflattering lighting that washes out facial features. Instead, angling your light source at 45 degrees often yields more natural shadows, adding depth and dimension. Furthermore, many underestimate the importance of flicker-free lighting, especially during video calls, since flickering—even if imperceptible—can cause headaches and visual discomfort over time. It’s worth investing in flicker-free LED lamps, especially if you spend long hours in front of screens. For more insights on choosing the right desk lamp, visit our detailed guide on selecting the perfect desk lamp.
Let’s address a nuanced question that often trips up even advanced users: Why do some bias lighting setups seem to worsen contrast and cause eye strain? The answer lies in improper placement and color temperature mismatches. Bias lighting should complement your display’s color profile—ideally at 6500K to match daylight, which reduces eye strain and enhances contrast without glare. A 2026 study published in the Journal of Vision confirms that correctly calibrated bias lighting can decrease visual fatigue, but only if it is placed correctly and has the appropriate color temperature. Placing bias lights too close or using overly warm or cool tones can create unwanted reflections, diminishing the beneficial effects.
Avoiding these advanced pitfalls by paying attention to precise placement, color temperature, and light flicker can significantly elevate your workspace experience. Remember, investing time into properly setting up your lighting system isn’t vanity; it’s a crucial aspect of ergonomic design that boosts productivity and eye health. Want to dive deeper into innovative LED solutions for your setup? Check out our comprehensive latest LED lamp innovations. Have you ever fallen into this trap? Let me know in the comments.Maintaining a well-lit workspace that consistently promotes comfort and productivity requires more than just initial setup; it demands regular upkeep and the right toolkit. Personally, I rely on a few high-quality tools and software solutions to ensure my lighting system stays optimal over time. One indispensable tool is a lux meter, like the Sekonic Light Meter, which allows me to quantitatively assess the actual light levels in my workspace. This helps me avoid the common mistake of relying solely on visual judgment, which can be misleading due to camera and eye differences. Regularly measuring ensures my LED lamps and bias lighting remain within recommended ranges, preventing issues like color mismatch or insufficient illumination.
Another critical aspect is software calibration. I predominantly use calibration tools like the SpyderX Elite to adjust my monitor’s brightness and color temperature to match my bias lighting, creating a balanced environment that reduces eye strain. This is especially vital as displays and lighting deteriorate over time, something that manual adjustments might overlook. Software calibration ensures consistency, and I recommend doing it every six months to maintain optimal conditions.
Consistent cleaning also plays a key role. Dust accumulation on LED lamps and ring lights can diminish their luminous efficacy and alter color accuracy. I use a microfiber cloth and compressed air to gently clean my fixtures monthly. Ensuring proper cable management is equally important; tangled cords not only look messy but can lead to wear and accidental disconnections that impair lighting. I utilize cable clips and sleeves for organization, which simplifies maintenance and reduces wear.
Thinking ahead, investing in modular lighting fixtures with replaceable components can save significant costs down the line. For instance, choosing LED lamps with replaceable drivers and diffusers ensures you can swap out parts without replacing entire units. This practice prolongs equipment lifespan and keeps your workspace’s aesthetic intact.
Looking to the future, the advent of smart lighting systems will revolutionize how we maintain our workspace illumination. Smart apps will enable remote diagnostics, real-time calibration, and automated scheduling, reducing the manual effort involved in upkeep. Companies like Philips Hue are already pioneering this space, aiming for seamless integration into workspace environments.
If you’re serious about long-term lighting performance, I recommend adopting a regular maintenance schedule that includes measuring, calibrating, cleaning, and upgrading your equipment as needed. Start by investing in a lux meter and software calibration tools—these will give you measurable benchmarks and confidence that your workspace remains optimal. For detailed product recommendations and maintenance routines, check out the recommended guide on LED lamps and bias lighting.
Consistency and proactive care are the pillars of effective workspace lighting. Remember, a well-maintained setup not only looks better but also supports your vision, reduces fatigue, and enhances your overall well-being. Try scheduling quarterly checks using your lux meter and calibration software—I promise it pays dividends in comfort and clarity over time.Even after all the adjustments and tools I’ve explored, one truth stands out: continuous experimentation and learning keep your workspace lighting at its best. A key insight I gained is that what works today might need refinement tomorrow—lighting isn’t static but a dynamic part of your environment. Remember, small tweaks—like adjusting your ring light’s angle or calibrating your bias lighting—can unlock a new level of comfort and professionalism. Embracing this mindset transforms your entire approach from a chore into a creative process, making your workspace reflect your growth.

About the Author
Ricardo Vargas
Director of Operations and Product Development
Ricardo Vargas is a seasoned professional in the lighting industry, currently serving as a Director of Operations and Product Development
LinkedIn Profile