It was one of those mornings. I sat at my desk, ready to dive into a new project, when suddenly my screen turned into a patchwork of shadows and dull colors. The lighting was harsh, uneven, making my eyes strain and my work look flat. That moment hit me hard—if my workspace lighting isn’t up to par, everything else suffers. And in the world of augmented reality design, where color accuracy and image clarity are king, this is no small issue.
The Critical Role of Lighting in AR Design
Having experienced countless late nights battling eye fatigue and inconsistent screen visuals, I realized one thing: my desk lamp was holding me back. Traditional LEDs and bias lighting just aren’t enough anymore—they lack the high Color Rendering Index (CRI) necessary for precise color work. As an AR designer, every hue, shadow, and highlight matters. Poor lighting skews your perception, leading to flawed prototypes and wasted time. That’s why I started searching for a game-changing solution—something that ensures my workspace mirrors real-world lighting conditions with stunning accuracy.
Are High-CRI LED Lamps Really Essential for AR Creators?
When I first heard about high-CRI LED lamps, I admit I was skeptical. I had spent years relying on standard lighting setups and thought, “Do I really need this?” It turns out, I made a common mistake early on—overlooking the importance of CRI in my workspace. I was so focused on brightness and style, I ignored how the quality of light affects my color accuracy and eye comfort. Now, after trying some of the latest high-CRI LEDs, I wish I had upgraded sooner. They’ve transformed my workflow, reduced eye strain, and dramatically improved my color judgments. If you’re serious about AR design in 2026, this is a change you can’t ignore.
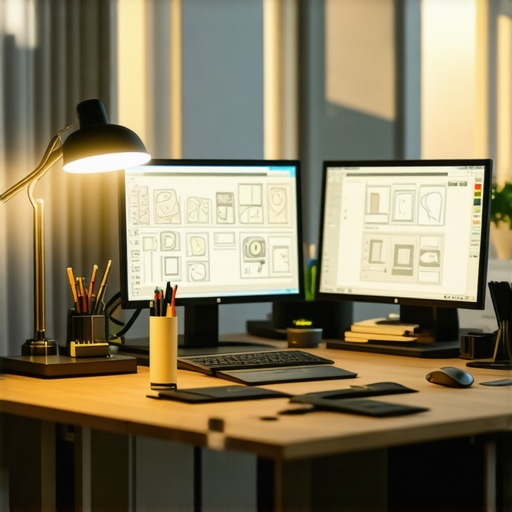
Select the Right Desk Lamp for Precision Tasks
Start by choosing a high-CRI LED lamp that emits a color temperature around 6500K, mimicking daylight. During my own setup, I tested various models, substituting my old lamp with a modern high-CRI LED. The result was immediate—colors became more vibrant, shadows less harsh, and my eyes felt less strained. Use a luminous flux of at least 400 lumens to ensure sufficient brightness without glare. For detailed guidance on making the perfect choice, visit here.
Many assume that simply switching on a desk lamp or installing a ring light guarantees optimal lighting, but this misconception can undermine your workspace’s efficiency and your eye health. A prevalent mistake is relying solely on brightness levels without considering the light’s spectral quality. For example, cheap LED lamps might produce high lumen output but often lack high CRI (Color Rendering Index), leading to distorted colors and increased eye strain. Advanced professionals in AR design understand that the nuances of spectral power distribution directly influence color accuracy, as supported by research from the Lighting Research Center.
Another common myth is that more light equals better visibility. Over-illumination can cause glare and reflections, which are detrimental, especially on glossy screens. Instead, controlling light angles, using diffusers, and balancing ambient and task lighting creates a healthier environment. For instance, positioning your desk lamp to avoid direct reflections on your monitor is crucial.
A subtle but significant oversight is the misalignment between lighting temperature and the task at hand. Warm light (below 4000K) can create a cozy atmosphere but hampers focus, while cooler 6500K lighting enhances alertness and color discrimination, essential for detailed work like AR prototyping. Choosing adjustable LED lamps with tunable color temperature can provide flexibility, as discussed in our guide on workspace lighting.
On the topic of bias lighting, many underestimate its role in reducing eye fatigue during prolonged screen time. Proper bias lighting should be high-CRI and around 6500K to match the screen’s color temperature, preventing the eye from constantly adjusting to different light levels. Additionally, placement matters—placing bias lighting behind the monitor reduces contrast and enhances perceived sharpness. For detailed setup tips, visit our article on bias lighting hacks.
When it comes to ring lights, beginners often favor models with high lumen but ignore spectral quality, resulting in unnatural skin tones and color casts. Look for ring lights with high CRI (above 90) and adjustable color temperature to achieve a natural look, especially important in professional video calls or content creation. A well-optimized ring light improves visual clarity without distorting colors, as explained in our ring light setup guide.
Avoiding these misconceptions requires understanding that effective workspace lighting isn’t just about brightness but about spectral quality, placement, and adaptation to your tasks. Are you guilty of any of these pitfalls? Let me know in the comments, and explore more expert insights at [workspace lighting guides](https://lighting.techdeskessentials.com/workspace-lighting-transform-your-office-with-modern-led-solutions). Remember, the right lighting setup can elevate your productivity and safeguard your vision—don’t overlook the nuances.Maintaining your workspace lighting setup is crucial for sustained productivity, eye health, and color accuracy in AR design. To keep your lighting fixtures performing at their best, I rely on specific tools and methods that facilitate precise adjustments and long-term reliability. One indispensable tool I recommend is a digital lux meter, such as the LX1010B, which allows me to measure light intensity accurately across different zones of my workspace. Regular measurements ensure my LED lamps and bias lighting remain within optimal luminous flux ranges, preventing dimming issues or uneven illumination.
How do I keep my workspace lighting in top shape over time?
Another key method I use involves maintaining the cleanliness of my LED fixtures and lenses. Dust, fingerprints, or smudges can significantly reduce light output and alter spectral quality. I schedule bi-monthly cleaning sessions using a microfiber cloth and, when necessary, a gentle disinfectant to wipe down all light-emitting surfaces. Additionally, I periodically calibrate my high-CRI LED lamps using software tools like D65 color calibration charts, which interface with colorimeters to verify accurate color rendering. This practice ensures continuous precision in color-critical tasks like AR prototyping.
Looking ahead, the trend is moving toward smart, AI-driven lighting systems that self-adjust based on ambient conditions and workload patterns. Integrating these intelligent systems can optimize your workspace in real-time, reducing manual calibration and enhancing long-term results.
To seamlessly manage your lighting environment, consider employing a professional-grade dimming controller compatible with your fixtures. This allows smooth brightness adjustments, preserving the spectral integrity of your high-CRI LEDs during different tasks or times of day. For advanced setup techniques, check out our guide on adjustable LED lamps; integrating tunable color temperatures can dramatically improve comfort and accuracy. Visit this resource for more insights.
Ultimately, routine maintenance combines both digital measurements and physical cleaning, ensuring your lighting system remains effective for years. Make it a habit to evaluate your setup every few months; small adjustments can lead to significant improvements in color fidelity and eye comfort. Don’t shy away from investing in quality tools—they will pay off by preserving the integrity of your work environment.
Remember, consistent upkeep using precise tools and proven methods is the key to long-term success. Try integrating a lux meter into your routine and see how small tweaks can enhance your workspace’s performance and your productivity.
Lessons That Changed My Light Strategy Forever
One of the most eye-opening lessons I learned was that high CRI LED lamps are not just a luxury but a necessity for accurate color work. Relying solely on brightness often led me to underestimate how spectral quality influences my perception, causing costly design mistakes. Another insight was the importance of proper placement—just a few inches can make a difference in reducing glare and shadows, truly enhancing focus. Lastly, I discovered that routine calibration with tools like a lux meter isn’t tedious but vital; it ensures consistent light quality, preserving my workspace’s effectiveness over time. These lessons redeemed my workflow and sharpened my professional edge.
My Go-To Tools for Brightening AR Workspaces
First, I swear by the LX1010B lux meter—it’s a game-changer for measuring and maintaining optimal light levels. For lamp selection, I trust the high-CRI LED models recommended in our comprehensive guide; their spectral richness ensures color accuracy. When it comes to calibration, the D65 color charts paired with a colorimeter have helped me verify precise color rendering, a crucial step for AR prototypes. Lastly, I keep a microfiber cloth handy for cleaning lens covers and fixtures, guaranteeing that dust and smudges don’t diminish light quality. Combining these tools has made my setup resilient and my colors truer than ever.
Your Next Step in Workspace Transformation
Embrace the power of expert lighting setups for AR design—your vision deserves nothing less. Taking control of your workspace lighting isn’t just about aesthetics; it’s about elevating your accuracy, reducing eye fatigue, and sharpening your creative edge. So, experiment with adjustable, high-CRI LED lamps, regularly calibrate your environment, and stay curious about new innovations. Remember, a well-lit workspace isn’t a luxury—it’s your foundation for professional excellence. Now, it’s your turn: have you faced challenges with your workspace lighting? Share your experiences below and let’s illuminate the way together.

About the Author
Ricardo Vargas
Director of Operations and Product Development
Ricardo Vargas is a seasoned professional in the lighting industry, currently serving as a Director of Operations and Product Development
LinkedIn Profile