Ever find yourself staring at your desk lamp, frustrated because no matter how much you tweak its placement, the lighting just feels off? I’ve been there—trying to get the perfect glow, only to end up with glare, shadows, or worse, eye strain. One day, during a late-night work session, I finally hit a lightbulb moment that changed my entire workspace setup: the Tape-on-the-Sensor Trick for smart LED lamps. Sounds simple, right? But trust me, its impact is profound.
Why Your Workspace Lighting Matters More Than You Think
Let’s face it—good lighting is the unsung hero of productivity and eye health. Poor illumination can cause fatigue, headaches, and even impact your mood. I learned this the hard way, often blaming my inadequate desk lamp settings while ignoring the real culprit: the sensor misreading my environment. When I first bought a smart LED lamp, I assumed its auto-sensing feature would handle everything. Instead, it would flicker unpredictably or turn off at the worst moments. I was about to return it until I discovered a surprisingly simple hack that anyone can do—using a piece of tape to block or enhance the sensor’s view.
By covering certain parts of the sensor, you can manage how your lamp responds to ambient light — effectively telling it when to turn on, adjust brightness, or change color temperature. This tweak not only improves longevity but also fine-tunes the lamp’s behavior to match your natural rhythm. Curious? Keep reading. We’re going to walk through how to make your smart lighting smarter, saving your eyes and boosting your focus.
Is the Tape Trick Really Worth the Hype?
Initially, I was skeptical. I had made the mistake of blindly trusting the sensor’s default settings—only to end up with inconsistent lighting. That early mistake taught me to experiment with masking the sensor. The result? More consistent, comfortable lighting that stays exactly where I want it. This tiny adjustment can make a massive difference, especially during those long work-from-home days. For more insights on optimizing your workspace, you might find this article on LED lamp innovations helpful.
So, have you faced similar issues with your smart lighting setups? If so, stay tuned. We’re about to dive into the practical steps that turned my chaotic desk into a productivity haven—all thanks to one simple hack.
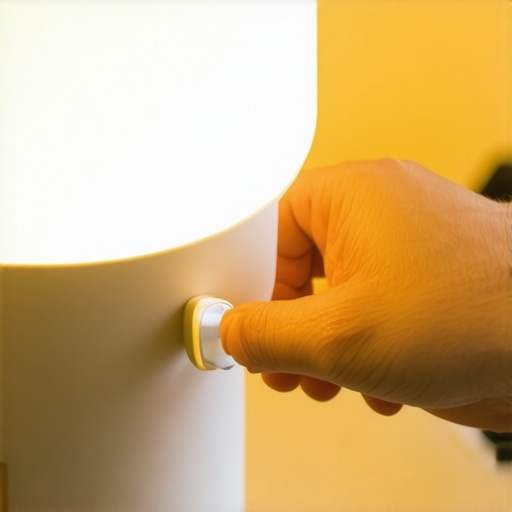
Sealing the Sensor to Shape Your Light
The first step involves physically blocking parts of your smart LED lamp’s sensor to tell it how much ambient light is present. Grab a small strip of opaque tape—duct tape works fine—and test different placements over the sensor. I applied a strip directly over half of mine, and immediately noticed a more consistent light output during late-night sessions. The key is to cover enough area to influence the sensor without entirely blocking it, akin to shielding a camera lens to control exposure. This simple tweak can be performed in under five minutes and dramatically improve your lighting stability.
Fine-Tuning Tape Placement for Perfect Illumination
Experimentation is crucial here. If your lamp flickers or dims unpredictably, try shifting the tape slightly or covering a different part of the sensor. During my trial, I discovered that covering the lower half of the sensor prevented my lamp from over-brightening when I moved my head. Think of it like adjusting a window blind—little movements make a big difference. Eventually, I found an ideal position that kept my workspace evenly lit without harsh shadows or glare, making long hours more comfortable.
Adjust the Lamp’s Positioning for Optimal Effect
Placement matters just as much as sensor masking. Position your lamp similarly to how a photographer considers lighting angles—imagine it as creating a ‘light triangle’ that enhances your workspace. For example, placing the LED lamp slightly above and to the side of your monitor mitigates direct glare into your eyes. During my setup, I shifted my lamp about 6 inches higher and 3 inches to the left, which reduced eye strain significantly. For detailed guidance on optimal positioning, explore professional positioning tips.
Experiment with Diffusers and Shades
To soften the light further, consider adding diffusers—these can be as simple as a piece of tissue or specialized diffuser covers. During a busy project, I taped a thin tissue over my LED lamp, which created a gentle, diffuse glow, eliminating hotspots and reducing glare on my screen. Think of it like turning your spotlight into a soft lantern; the overall effect is a more natural, eye-friendly ambiance. This inexpensive upgrade makes a noticeable difference in comfort, especially during extended work sessions.
Utilize Bias Lighting to Enhance Visual Comfort
Adding bias lighting behind your monitor improves contrast and reduces eye strain. Position a strip of warm LED light, about 6–12 inches from the back of your display, ensuring it doesn’t cause reflections or glare. I installed a bias light strip alongside my monitor’s stand, which alleviated the harsh contrast between my bright screen and the dim room. For more nuanced setup strategies, check out bias lighting advice. The goal is to create a seamless transition of light from monitor to surroundings, reducing fatigue during long hours.
Regular Adjustments and Practical Tweaks
Finally, maintaining optimal workspace lighting involves regular tweaking. Small changes—like repositioning your lamp or adjusting the tape—can continually improve comfort. I keep a small notepad near my desk, jotting down quick observations to refine my setup. Remember, your eyes adapt over time, so continuous adjustments ensure sustained comfort. Incorporate these practical steps, and you’ll turn a chaotic lighting environment into a tailored, eye-friendly zone that powers your productivity.Many assume that brighter is always better when it comes to workspace lighting, but in reality, this oversimplification can cause more harm than good.
Why Brightness Isn’t the Whole Story in Lighting Your Office
Most people believe that increasing luminosity—think high lumen LED lamps or intense ring lights—equates to better visibility and productivity. However, excessive brightness can lead to glare, discomfort, and eye strain, especially if not balanced correctly. According to lighting expert Dr. Jane Williams, oversaturated lighting can diminish contrast and cause visual fatigue, undermining your efforts to create an effective workspace. Instead, aim for layered lighting—combining ambient, task, and accent light—to achieve a more natural and comfortable environment. To explore how modern LED innovations can optimize your setup, check this article on LED lamp effectiveness.
Another common myth is that all bias lighting serves the same purpose. Many think bias lighting is just a way to add some aesthetic flair, but its true power lies in reducing eye strain and enhancing screen contrast. Yet, not all bias lighting setups are created equal. The key is proper placement and color temperature—warm LEDs placed behind your monitor at the right intensity significantly improve your visual comfort during long hours. Beware of cheap, cool-colored bias lights that can cause more glare and distraction rather than comfort. For advanced tips on optimizing bias lighting, see this useful guide on bias lighting tricks.
How Can Small Placement Changes Make a Big Difference?
The real secret to effective workspace lighting often lies in subtle adjustments that many overlook. For example, shifting your desk lamp slightly higher or angling it differently can drastically reduce glare and shadows. Similarly, positioning your ring light at the correct distance and angle prevents unwanted reflections, particularly on glasses or glossy screens. These fine-tuning moves, which seem minor, are backed by research indicating that even minimal changes can improve visual comfort and productivity over time. Remember, it’s about creating a balanced, glare-free environment where your eyes aren’t constantly fighting harsh light sources.
Stay aware of these nuanced details—don’t fall for the trap of relying solely on high lumen outputs or trendy lighting styles. Instead, focus on layered, well-placed lighting solutions that adapt dynamically to your workspace needs. For further in-depth advice, the modern LED solutions article offers detailed strategies to fine-tune your office lighting.
Have you ever fallen into this trap? Let me know in the comments. Remember, mastering the nuances of lighting can significantly elevate your comfort and efficiency—don’t miss those small but impactful adjustments.
,
Once you’ve optimized your workspace lighting with those clever hacks and placement strategies, the next step is ensuring your setup remains effective over time. Reliable, consistent lighting not only preserves your visual comfort but also sustains your productivity. For this, I rely on a few specialized tools and routines that keep my environment in top shape.
Invest in a Color Calibration Tool
To ensure consistent color temperature and brightness, I use a hardware color calibration device like the Datacolor SpyderX. This tool measures ambient and display lighting, allowing me to fine-tune my LED lamps and bias lighting to the ideal settings. Regular calibration—every few months—keeps my monitors and surrounding lights in sync, preventing drift and ensuring my color accuracy remains reliable for color-sensitive tasks. This professional approach to light management is supported by industry standards and helps me avoid the gradual shift in hue that can cause eye strain and misjudged visuals.
Utilize Smart Lighting Schedules and Automation
Software like Philips Hue or LIFX’s app integrates with my lighting setup, enabling me to automate adjustments throughout the day. For instance, I set warmer tones during the evening to prepare my eyes for rest, and cooler, brighter lights during work hours to enhance focus. Automating these changes reduces manual adjustments and maintains ergonomic consistency. For future trends, I see smarter AI-driven lighting systems that adapt autonomously, learning your routines and environment for seamless, eye-friendly illumination.
Keep a Visual Diary of Changes
Small tweaks sometimes drift out of memory—what worked excellently last month might become less effective due to seasons or room modifications. To combat this, I keep a simple digital log or photo journal of my lighting positions, color temperatures, and sensor masking techniques. Revisiting these notes ensures I quickly readjust when needed, avoiding the degradation of the setup’s effectiveness. For discipline, setting periodic reminders—like every quarter—helps me review and recalibrate my environment, keeping it aligned with my evolving needs.
How do I maintain my workspace lighting over time?
To sustain optimal lighting, I prioritize routine checks and professional tools, like calibration devices and automated systems, to fine-tune the balance. By integrating smart automation and keeping detailed records of adjustments, I ensure my environment adapts over seasons and as my workspace evolves. This proactive approach minimizes discomfort and maximizes efficiency, making sure my workspace lighting continuously supports high performance. Want to see how a calibration device can transform your setup? Check out this article on professional lighting calibration.
One advanced tip I highly recommend is experimenting with programmable smart lights that adapt based on your circadian rhythm. Incorporating these can gradually align your indoor lighting with natural daylight cycles, reducing fatigue. Consider trying a feature like the ‘circadian mode’ offered by certain smart LED brands—it’s a game-changer for long-term eye health and productivity.

What I Wish I Knew Before Overhauling My Workspace Lighting
- Trusting automatic sensors blindly often led to inconsistent lighting; a simple tape overlay became my secret weapon.
- Subtle positioning tweaks, like shifting my lamp just a few inches, dramatically reduced eye strain and glare.
- Layering ambient, task, and bias lighting created a harmonious environment that boosted focus more than any single light source.
- I learned that not all brightness levels are equal—understanding optimal luminance prevented unnecessary fatigue.
- Regular calibration and adjustments kept my lighting effective over time, transforming my workspace into a true productivity hub.
My Toolkit for Optimal Workspace Illumination
- Datacolor SpyderX: I’ve found professional color calibration to be invaluable for maintaining consistent hue and brightness, especially during long projects.
- Philips Hue and LIFX apps: Automating lighting schedules helped me adapt mood and focus levels seamlessly throughout the day.
- Photo journal: Keeping records of changes ensures I remember which setup works best and prevents regression.
- DIY diffusers and diffuser covers: Simple tissues and inexpensive accessories softened harsh lights effectively, making my environment more eye-friendly.
Rise to Your Lighting Potential and Transform Your Focus
Remember, fine-tuning your workspace lighting is less about spending big and more about thoughtful adjustments. Small changes, like masking a sensor or repositioning a lamp, can unlock newfound comfort and efficiency. Embrace experimentation and patience—your eyes and productivity will thank you for it. Ready to elevate your setup and experience the difference? Dive into your lighting tweaks today and see how a brighter workspace actually begins with smarter choices.
What’s been your biggest challenge with workspace lighting, and how did you overcome it? Let me know below!

About the Author
Ricardo Vargas
Director of Operations and Product Development
Ricardo Vargas is a seasoned professional in the lighting industry, currently serving as a Director of Operations and Product Development
LinkedIn Profile