Have you ever stared at your latest macro shot only to be greeted by harsh, unflattering shadows that ruin the entire image? I can’t count how many times I’ve felt that crushing disappointment when my lighting setup didn’t deliver the smooth, balanced illumination I envisioned. One evening, after a frustrating hours-long shoot, I had a lightbulb moment that changed everything: it wasn’t about buying the newest equipment, but about knowing exactly how to manipulate existing lighting to eliminate those pesky shadows. And let me tell you, mastering this skill made my macro photography not just better, but truly professional-looking.
Why Fixing Harsh Shadows Matters in Macro Photography
Macro photography is detail-oriented—every tiny nook and cranny counts. Harsh shadows can obscure textures, distort colors, and create distractions that take away from the subject’s true beauty. Moreover, in a professional setting, poor lighting can undermine your credibility, making even stunning subjects appear flat or unappealing. That’s why understanding effective ways to control light and shadows isn’t just a luxury; it’s a necessity. I’ve found that a few strategic tweaks can make the difference between a photo that looks amateurish and one that celebrates every minute detail in crisp, clean clarity.
If you’ve ever faced the frustration of uneven lighting in your shots, you’re not alone. Even seasoned photographers sometimes struggle with shadow management, especially with macro work’s demanding precision. But here’s the good news: with the right tactics, you can avoid the shadow pitfalls and produce consistently stunning images. Today, I’ll share seven professional tricks I’ve tested personally, which will help you tame those shadows for good. Plus, I’ll guide you on how to adapt these tactics seamlessly into your current setup, whether you’re using a ring light, desk lamp, or bias lighting.
What if your current lighting setup is still leaving you in the dark?
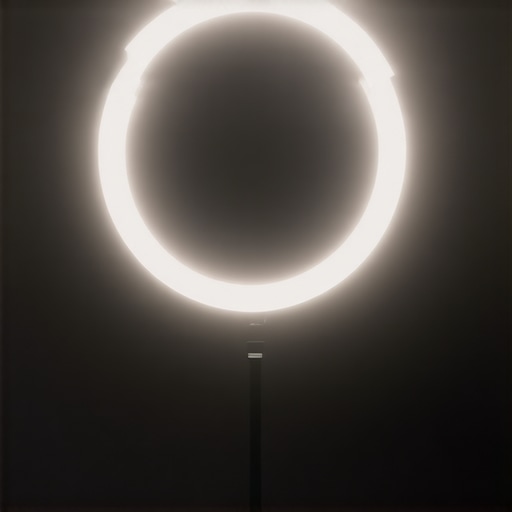
Early on, I made a classic mistake—relying solely on my ring light without considering its placement and how it interacts with other light sources. Just stacking lights doesn’t guarantee success; positioning, intensity, and diffusing matter just as much. For a comprehensive approach, check out this guide on modern workspace lighting. Now, let’s explore some practical, proven tactics to work with your existing gear and bid farewell to those distracting shadows once and for all.
Position Your Light Source Strategically
My first step was experimenting with the placement of my existing ring light. Instead of centering it directly over my macro subject, I moved it a few inches to the side. This simple shift created softer shadows, revealing textures more clearly. Think of your light as a painter’s brush—angle matters. For more tips on optimal positioning, check out this guide on ring light positioning.
Diffuse Your Light for Soft Shadows
Next, I added a piece of white tissue paper or a thin cloth between my light and the subject. This diffusing layer acts like a filter, scattering light evenly and reducing harsh shadows. Imagine shining a flashlight through a fog—they become less sharp and more natural. If you’re unsure about DIY diffusers, exploring this article on diffusing techniques can provide more insights.
Utilize Reflectors to Fill Shadows
I placed small, white reflectors—like foam boards or even sheets of paper—opposite the light source. These bounce light back onto shadowed areas, evening out lighting across the tiny surface. Think of it as bouncing sunlight on a cloudy day to brighten shadows. When I was photographing a dewdrop, the reflector eliminated distracting shadows, making the water droplet sparkle. For a detailed look at reflector usage, review this guide on reflectors and bounce lighting.
Control Ambient and Background Lights
Ambient light from windows or room lamps can interfere, creating unintentional shadows. I turned off or dimmed other light sources and used blackout curtains when needed. It’s like creating a dedicated studio space within your room. By reducing uncontrolled background lighting, you maintain better shadow control. For suggestions on managing ambient lighting effectively, see this article on workspace lighting.
Harness the Power of Fine-Tuning Your Equipment
Finally, I learned to adjust the intensity and angle of my existing lights gradually. Small tweaks—such as dimming the light or angling it slightly—made a significant difference. It’s akin to tuning a musical instrument until all the strings sing in harmony. For advanced dimming and angling techniques, explore this resource on lighting adjustments. Over time, these subtle modifications became second nature, helping me produce consistency in shadow management.
Many assume that choosing the right ring light, desk lamp, or bias lighting is simply a matter of selecting the brightest or most popular option. However, as an expert in illumination techniques, I can tell you there’s a subtle yet critical nuance often overlooked: the quality of light and its spectral characteristics matter far more than brightness alone. This misconception leads many to fall into a trap of over-illuminating their workspace with high-lumen LEDs that emit harsh, unnatural light, which can cause eye strain and diminish contrast, especially during prolonged work sessions. Instead, understanding the importance of high Color Rendering Index (CRI) lights and appropriate color temperatures can dramatically enhance clarity and comfort. Studies, such as one published in the Journal of Environmental Psychology, highlight that high-CRI lighting reduces visual fatigue and boosts focus, which is essential for productivity and well-being. Furthermore, many enthusiasts buy into myths like ‘bigger is better’ or ‘blue light is inherently harmful,’ without considering that adjustable, spectrally balanced lighting tailored to your environment yields far better results. Beware of the trap where cheap, off-brand LEDs promise high brightness but deliver poor spectral quality, leading to dull, washed-out images or eye fatigue after just a few hours. Always look for LED lamps designed with dimming capabilities and high CRI ratings—ideally 90 or above—to truly benefit from your workspace lighting investments. Remember, the goal isn’t just to light up your desk but to create an environment that enhances vision, reduces fatigue, and supports your tasks seamlessly. For example, the latest LED innovations emphasize tuneable spectrum and flicker-free technology, which are critical features often missed by casual buyers. To optimize your setup, pair your high-quality LEDs with well-positioned, diffused sources—this combination amplifies subtle nuances in your workspace, whether for macro photography, detailed editing, or long working hours. Want to explore the most advanced LED innovations? Check out [this guide on modern LED lamp advancements](https://lighting.techdeskessentials.com/led-lamp-innovations-brighten-your-desk-and-boost-productivity). Have you ever fallen into this trap? Let me know in the comments.Maintaining an effective lighting setup is essential for consistent macro photography results and workspace comfort. I rely heavily on high-quality, dimmable LED lamps with adjustable color temperatures, such as the latest models highlighted in [this guide on LED innovations](https://lighting.techdeskessentials.com/led-lamp-innovations-brighten-your-desk-and-boost-productivity). These tools allow me to fine-tune lighting conditions over time, ensuring durability and adaptability. Regularly cleaning your fixtures and replacing bulbs proactively prevents flickering or diminished brightness, which can subtly impact your images and work environment. Additionally, calibrating your lights periodically using a color temperature meter helps keep your setup consistent, particularly if you work across different days or projects.
Lessons That Changed My Approach to Workspace Lighting
One of the most eye-opening lessons I learned was that perfect lighting isn’t about having more lights but about manipulating what I already have with intentionality. Moving a light slightly can turn a harsh shadow into a soft contour, revealing textures I never saw before. It was a true revelation that patience and experimentation trump equipment upgrades every time.
I also discovered that diffusing light doesn’t need to be complicated or expensive. A simple tissue paper or a piece of cloth can make a dramatic difference, eliminating distracting shadows and creating a natural, even glow—saving me from costly reflectors or modifiers. This humbling realization emphasized that innovation often resides in simplicity.
And perhaps most valuable, I realized the importance of your environment. Controlling ambient and background light sources can significantly impact shadow quality. Dimming or turning off excess lights transformed my macro shots overnight. Sometimes, creating a mini-studio in your space is as straightforward as understanding how your environment interacts with your existing lighting setup.
Curated Tools and Resources That Elevate Your Lighting Game
For anyone looking to deepen their understanding, I highly recommend exploring high-CRI LED lamps with adjustable color temperatures. The resource this comprehensive guide offers insights into selecting the best lighting for your workspace, which directly translates into better macro photography results. Additionally, books like “Light Science & Magic” by Fil Hunter provide foundational knowledge that transforms how you perceive and manipulate light. Lastly, following trusted blogs and experts who share real-world experiments and failings keeps your approach fresh and grounded in practicality.
Embrace Your Lighting Journey and Keep Experimenting
Taking control of shadows in macro photography is a gradual process filled with learning, adjustments, and sometimes setbacks. But every tweak brings you closer to images that truly reflect the tiny world you’re capturing. Remember, the most vital step is to start experimenting with what you have—because innovation often begins at home. Keep pushing boundaries, stay curious, and never underestimate the power of thoughtful lighting in revealing the hidden beauty in every detail.
How have you adjusted your lighting setup to better control shadows in your macro shots? Share your experiences below!
}**ord**: 1}#**json** {

About the Author
Ricardo Vargas
Director of Operations and Product Development
Ricardo Vargas is a seasoned professional in the lighting industry, currently serving as a Director of Operations and Product Development
LinkedIn Profile