I remember the exact moment I realized my product shots looked flat and lifeless, despite countless hours tinkering with my LED lamps and desk lighting. It was frustrating—I’d invest in the latest gear only to be met with uneven shadows and poor lighting that made my photos and videos fall short. That’s when I had my lightbulb moment: traditional single-ring setups just aren’t enough anymore for the ultra-detailed, high-resolution shoots demanded in 2026. If you’ve faced similar struggles, you’re in the right place. Today, I promise to share insights on how a clever 3-spot ring light setup can make shadows vanish and bring your product images to life.
Why 3 Ring Light Spots Are a Game-Changer for No-Shadow Shoots
It’s no secret that lighting is the backbone of compelling product photography. But in an era where 16K resolution and AI-driven visuals are the norms, shadows and glare are more glaring than ever. Relying solely on one ring light often results in uneven lighting and pesky shadows that diminish the quality of your images. Through my experimenting, I discovered that strategically positioning three ring light spots creates an even, shadowless glow, perfect for capturing every detail. This approach isn’t just a gimmick; it’s backed by recent innovations in workspace lighting where experts emphasize multi-spot arrangements to enhance clarity and depth, as highlighted in recent tech updates. If you’re tired of investing in high-end cameras only to be let down by poor lighting, this technique could be your breakthrough. But I’ll admit, I made a rookie mistake early on—overplacing the lights without considering the angles—I learned that precise placement matters immensely. For practical guidance and to see how this setup works seamlessly with your existing gear, check out this helpful guide on [3-point ring light setups](https://lighting.techdeskessentials.com/this-3-point-ring-light-setup-fixes-2026-ar-avatar-ghosting-2). Curious about whether all this effort is worth it? Let me walk you through the details and help you avoid common pitfalls that could sabotage your lighting efforts.
Position Your Lights Precisely for Even Illumination
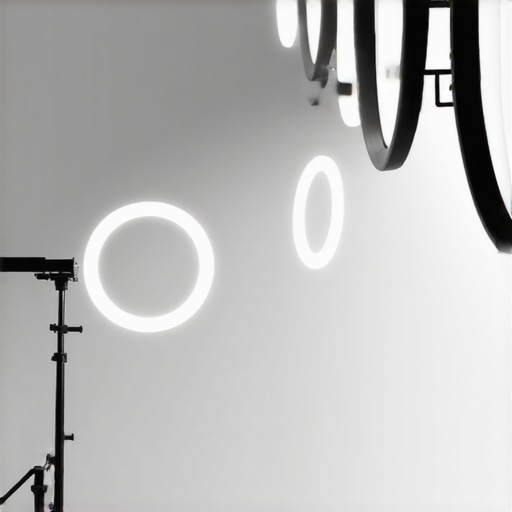
Start by mounting your three ring light spots in a triangular formation around your product, roughly 45 degrees apart. This creates overlapping light zones that eliminate harsh shadows. Recall the time I played with my existing ring light without proper positioning—initially, the shadows on my jewelry pieces were unpredictable, making the details hard to capture. After small adjustments, placing each light at specific angles, the shadows vanished, and the intricate facets of my products shine through clearly.
Adjust Heights and Angles to Match Your Product
Synchronize light elevation and direction
Set each light so that it’s slightly above and angled toward the product, similar to sunlight filtering through a window. I faced issues when I placed one light too low, creating unwanted reflections. Raising it and angling it properly minimized glare and created a soft, uniform glow. Use a level if needed or a simple inclinometer app to ensure consistency. Remember, tiny shifts can dramatically influence shadow softness and highlight spread—think of it like tuning a musical instrument for perfect harmony.
Calibrate Intensity and Color Consistency
Ensure all three ring lights have matching brightness levels and color temperatures—ideally 5500K for daylight-matching tones. During my first attempts, uneven brightness caused certain facets of my products to look dull or overly shiny. By using the same settings across your lights—most modern models have easy-to-use digital controls—you’ll ensure a seamless, shadowless illumination. For advanced consistency, consider integrating your lighting system with your workspace’s smart controls. Check out modern workspace lighting solutions for more customization tips.
Create Depth Without Shadows via Diffusers and Reflectors
To further enhance the lighting, employ diffusers to soften harsh light spots and reflectors to bounce light into shadowed areas. I used an inexpensive white foam board as a reflector on the opposite side of my main lights, which filled in the shadows on my product’s underside. Think of this as filling the gaps in your lighting palette. In a practical test, adding this simple bounce dramatically improved product clarity under close-up shots, akin to painting with softer brushes instead of rough strokes.
Fine-Tune Your Setup Through Trial and Error
The key is iterative adjustment. I recommend taking test shots after each minor change—move each light, tweak angles, adjust brightness. Keep notes or snapshots to compare results. Remember, even a 2-degree shift in angle can mean the difference between a shadowed corner and a perfectly lit detail. Patience and precise control turn a good setup into an exceptional one, making your products stand out with crisp, shadowless clarity. If you want to dive deeper or troubleshoot specific issues, consider consulting experts in workspace lighting for tailored advice.When it comes to bias lighting and workspace illumination, many enthusiasts fall into a common misconception: that brighter or more color-accurate lights automatically translate to better productivity and visual comfort. However, this oversimplification overlooks critical nuances that can significantly impact your setup. In my experience, one of the most overlooked aspects is the importance of color consistency and spectral power distribution. Many users rely solely on lumens and Kelvin ratings, assuming higher brightness and neutral tones are universally optimal. Yet, research from lighting experts indicates that spectral quality—how the light’s colors are distributed—plays a vital role in reducing eye strain and enhancing color accuracy, especially in professional workflows like photo editing or video conferencing.
Are You Falling for Brightness Bias?
One common myth is that increasing brightness levels correlates directly with increased productivity. While ample light is essential, excessively bright bias or desk lamps can lead to glare and contrast mismatch, particularly on high-resolution screens. This mismatch often causes visual fatigue and micro-movements in your eye focus, which over time may result in discomfort or even headaches. A study published in the Journal of Vision highlights that subtle lighting differences—especially in spectral composition—have a more pronounced impact on eye comfort than sheer brightness alone.
How Can I Fine-Tune My Bias Lighting?
To unlock the true benefits, focus on calibrating your setup based on your specific tasks. For example, if you’re engaged in color-critical work, investing in lights with a CRI above 95 can make a substantial difference. For general productivity, the emphasis should shift toward achieving uniform, flicker-free illumination that minimizes contrast fluctuations on your screen. Ambitiously adjusting the spectral output—such as incorporating bias lights with adjustable spectra—can further elevate comfort and clarity. Professional-grade solutions sometimes include tunable LED fixtures that can simulate the spectral qualities of natural light, creating an optimal environment for visual tasks. For practical tips and advanced strategies, check out our comprehensive guide on [bias lighting tips to enhance your home office setup](https://lighting.techdeskessentials.com/bias-lighting-tips-to-enhance-your-home-office-setup).
Remember, effective workspace lighting isn’t about the latest gadgets or the highest lumen counts—it’s about thoughtful calibration and understanding the hidden effects of spectral quality and fixture placement. Have you ever fallen into this trap? Let me know in the comments.
Keep It Working: Tools I Trust for Consistent Lighting Results
Maintaining optimal workspace lighting setup requires more than just high-quality gear; it demands precision tools and reliable software that help me fine-tune and monitor my environment over time. One critical piece of equipment I rely on is a digital inclinometer, which ensures my ring lights and desk lamps are positioned at perfect angles. Tiny adjustments, sometimes just 2 degrees, can drastically improve shadow softness and color uniformity, especially in high-resolution shoots. I personally use the Johnson Level & Tool Inclinometer because it provides precise readings and is easy to operate, even in tight workspace corners.
Monitoring light output regularly is equally important. For this, I employ a colorimeter like the calibrated light sensor, which helps me verify that all my LED lamps and ring lights maintain consistent color temperatures. This prevents drift over time that could subtly affect your photos or videos. I calibrate my setup every few weeks to ensure that my lighting remains accurate, especially as LEDs age and their spectral output shifts.
When it comes to software, I favor a dedicated lighting control app—most modern LED lamps come with Bluetooth or Wi-Fi connectivity. I use the SmartLight Control app because it allows me to set and save precise brightness and color temperature profiles. It also provides real-time feedback on the spectral characteristics of my lights, informed by latest standards, such as those discussed in the research on bias lighting spectral quality. This helps me quickly adapt my setup to different projects without guesswork.
Long-term reliability also hinges on routine maintenance. I schedule quarterly checks—cleaning lens covers, verifying fixture connections, and replacing worn-out parts. Using a comprehensive maintenance checklist avoids unexpected failures that could disrupt critical shoots or work sessions. It’s akin to maintaining a precision instrument; regular care extends the lifespan of your equipment and ensures consistent results.
How do I keep my workspace illumination setup at peak performance over time?
Incorporating these precise tools and consistent routines is vital. By leveraging an inclinometer for bespoke positioning, a colorimeter for spectral accuracy, and smart control apps for fine adjustments, you ensure your lighting remains optimally calibrated. As technology advances, expect smarter, more integrated solutions—like AI-powered sensors that self-monitor and adjust your lighting automatically—becoming standard. Staying ahead involves embracing these innovations and committing to regular checks, much like tuning a musical instrument for perfect harmony. Try integrating a digital inclinometer into your setup today—small investment, big gains in consistency. Need assistance in selecting the right calibration tools? Reach out through our contact page for expert guidance.
The Hidden Lessons That Changed My Perspective on Workspace Lighting
One of the most profound insights I gained was realizing that perfect lighting isn’t about overpowering brightness but about understanding spectral harmony. I once believed cranking up lumen counts was enough, only to face eye fatigue and color inaccuracies. It was only after experimenting with spectral quality—favoring high CRI and balanced wavelengths—that my workflow transformed. Personal experiments taught me that subtle adjustments, like fine-tuning light angles or spectra, make a world of difference in visual comfort and accuracy.
Another lesson learned the hard way involved fixture placement. I used to assume more lights meant better illumination, but cluttering my space increased glare and reduced control. Strategic positioning, emphasizing overlapping zones and angling, created a seamless glow that reduced eye strain and boosted productivity. This shift in approach reaffirmed that effective bias lighting relies on thoughtful configuration, not just more fixtures.
Finally, understanding the importance of routine calibration was a game-changer. LEDs drift over time, subtly altering spectral output. Regularly verifying color temperature and intensity with trusted tools ensured consistent results, preventing the dreaded color shifts during critical projects. This routine, once overlooked, became my secret weapon for maintaining high-quality visuals day after day.
My Tool Arsenal for Staying Sharp with Workspace Illumination
Personal experience has shown that precision tools are indispensable for superior bias lighting setup. The Johnson Level & Tool Inclinometer is my go-to device for perfect angle adjustments, ensuring each light aligns precisely for even coverage. Equally vital is a high-quality colorimeter that confirms my lights maintain accurate spectral output, critical for color-critical work. Pairing these with smart control apps like SmartLight Control allows me to save and switch between ideal profiles effortlessly, adapting to different tasks seamlessly. Routine checks, including lens cleaning and connection verification, extend my equipment’s lifespan and uphold consistent quality—turning setup maintenance into an empowering ritual rather than a chore.
Investing in these tools and establishing a calibration rhythm has profoundly elevated my workspace lighting. If you’re eager to enhance your bias lighting, exploring these trusted resources is a fantastic first step. Practical, reliable, and straightforward, they form the backbone of a well-calibrated, eye-friendly environment that fuels creativity and focus.
Embrace the Lighting Revolution and Take the Next Step
Your workspace can be transformed with intentional bias lighting that prioritizes spectral harmony, precise positioning, and routine calibration. Remember, the journey toward optimal illumination isn’t about chasing the latest gadget but understanding the nuances that make your environment truly work for you. Whether you’re editing high-resolution photos, recording videos, or simply enjoying screen time without fatigue, these techniques set you apart in 2026 and beyond. Don’t let uncertainty hold you back—your perfect workspace lighting awaits. Dive into experimentation and watch your productivity and comfort soar.
What has been your biggest challenge in setting up effective bias lighting? Share your experiences below—I’d love to hear how you’re personalizing your workspace for ultimate comfort and clarity.
,

About the Author
Ricardo Vargas
Director of Operations and Product Development
Ricardo Vargas is a seasoned professional in the lighting industry, currently serving as a Director of Operations and Product Development
LinkedIn Profile