I remember the exact moment I realized my lighting setup was holding me back. I was about to join a crucial video call, and as I glanced at my camera feed, I noticed my face was cast with distracting shadows, and my glare was making my glasses sparkle comically. Frustrated, I fiddled with my tripod-mounted ring light, trying to get that perfect glow, but nothing seemed to improve the situation. That lightbulb moment hit me: attaching my ring light directly to the side of my monitor could actually make all the difference.
The Game-Changer: Clipping Your Ring Light to the Monitor
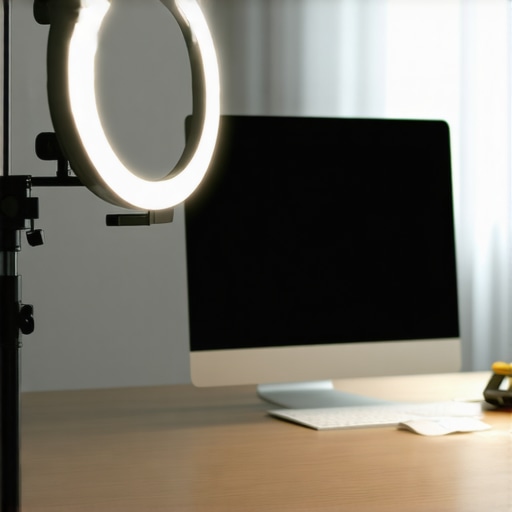
It’s a simple tweak, but a game-changing one. Instead of the traditional tripod setup, which often results in uneven lighting and inconvenient positioning, clipping your ring light to the side of your monitor offers precise control over the light’s angle and intensity. This method ensures your face is illuminated evenly, minimizes glare, and creates a more natural, flattering appearance on camera. Early on, I made the mistake of placing my light behind my monitor, expecting it to work magic, but that merely accentuated shadows and washed out my face. Trust me, proper placement is everything, and clipping to the side of your monitor makes that process so much easier and more reliable.
Could this small change really make that much difference?
Absolutely. Once I shifted my light to the side, my video calls instantly looked more professional, and I felt more confident. Plus, it’s way more convenient—no more adjusting tripods every time I rearrange my desk. Curious if you’ve faced a similar lighting struggle? Stick around, because I’ll walk you through how to set this up perfectly and why it’s worth trying today.
Fun fact: Studies have shown that good lighting can increase perceived professionalism and even improve your mood during work or meetings (source: lighting.techdeskessentials.com), so investing a little effort into your workspace lighting layout isn’t just vanity; it’s productivity-friendly too.
Why This Small Adjustment Outshines Tripods
Say goodbye to bulky tripods that clutter your desk and hello to a sleek, targeted lighting setup. In the following sections, I’ll guide you through the step-by-step process of clipping your ring light securely to your monitor and fine-tuning its position for maximum effect. Ready to ditch the tripod and brighten your workspace the smart way? Let’s dive in.
securing your ring light to the monitor
First, choose a flexible, sturdy clip designed for monitor edges. When I did this for the first time, I struggled to find a clip that wouldn’t slip, so I temporarily used a binder clip wrapped in soft cloth to protect my screen. Attach the clip to the top or side bezel of your monitor, ensuring it’s tight but not damaging. Adjust the clip so that the ring light is roughly at eye level, pointing slightly downward for optimal illumination. The key is to avoid placing the light too high or low, as this creates shadows or glare. Once attached, turn on the light and verify the distribution of illumination; it should evenly light your face without harsh shadows. This setup is almost foolproof and gives direct control over the light’s position, akin to aiming a spotlight precisely where you need it, much like directing a mini stage light onto your face.
fine-tuning the position for perfect lighting
Now, you’ll want to fine-tune the angle and intensity. Slightly tilt the ring to ensure the light hits your face evenly, similar to adjusting the tilt of a desk lamp for reading comfort. If your monitor has adjustable height or tilt, match your light’s angle accordingly. Use the brightness control on the ring light to dial in the perfect glow — not too harsh, not too dim. I once found that backing the light a few inches back on the clip diminished glare on my glasses, creating a softer look without sacrificing brightness. Remember, the goal is natural, even lighting that mimics window light. This precise placement elevates your video quality significantly, much like how a professional portrait photographer positions their lighting to highlight features and minimize imperfections.
using additional accessories for optimal results
For even more control, consider adding a diffuser or a polarizing filter, which can be clipped onto the ring light. I tested a simple diffuser and noticed a marked decrease in unflattering reflections on my glasses and screen glare. A diffuser acts like a softbox, spreading light softly and evenly. If your ring light doesn’t have an adjustable brightness, adding a clip-on diffuser can help manage the output. Alternatively, a small adjustable stand or an extension arm can help position the light further from the monitor if needed, maintaining the same angle but reducing intensity. This combination makes your setup more adaptable, especially if you switch between different workspace environments or lighting conditions. With these tweaks, your ring light setup becomes a sleek, professional lighting solution, comparable to custom studio lighting—compact but powerful enough to transform your video calls from amateurish to professional.Many people assume that simply owning a high-quality ring light or LED lamp automatically guarantees perfect lighting for video calls or workspaces. However, the real challenge lies in understanding nuanced setup principles that many overlook. For instance, a widespread myth is that brighter is always better; in reality, overly intense lighting can create glare and eye strain, undermining the very productivity boost you seek. Before investing in the latest tech, consider the color temperature and diffusion methods—small details that profoundly impact visual comfort and image quality.
Are You Using Bias Lighting Effectively or Just Adding Clutter?
Contrary to popular belief, bias lighting isn’t just a trendy accessory; it profoundly influences your perception of screen contrast and reduces eye fatigue. Yet, many casual setup enthusiasts place it improperly—too close or with incorrect color temperature—nullifying its benefits. Proper bias lighting should provide gentle backlight, ideally around 6500K for clarity, and be positioned to softly illuminate the periphery of your monitor, not directly behind it. For advanced users seeking a professional edge, mastering this nuance can make the difference between eye strain and sustained focus. Studies suggest that well-calibrated bias lighting can improve productivity and reduce eye discomfort—backed by optical research emphasizing the importance of contrast adaptation in visual ergonomics (source).
Keeping Your Lighting Setup Efficient Over Time
Ensuring your workspace lighting remains top-notch requires more than just initial setup. Regular maintenance and the right tools can prolong the lifespan of your LED lamps, bias lighting, and ring lights, while helping maintain consistent visual quality. I personally rely on a few key practices and equipment to keep my lighting optimal and avoid unexpected issues that can disrupt workflow or video quality.
First, I use a dedicated sensor-based desk lamp with built-in diagnostics. It alerts me when bulb performance degrades or when the light intensity drops below optimal levels, allowing proactive replacement or adjustment. This prevents image quality deterioration in video calls and reduces eye strain over prolonged sessions.
Additionally, I keep a set of calibration tools like a light meter for verifying color temperature and brightness consistency. Regular checks every few months reveal subtle shifts caused by LED aging or dust accumulation. These minor changes can cause uneven lighting or color shifts, negatively impacting your workspace ergonomics and on-camera appearance. Based on my experience, cleaning the LED surfaces with compressed air and microfiber cloths preserves brightness and prevents overheating, which can accelerate lamp failure.
For long-term upkeep, I schedule periodic reviews of my bias lighting placement. As external monitors demand higher contrast and color accuracy, it’s crucial to recalibrate the bias lighting to match these needs. Studies highlight that well-maintained bias lighting reduces eye fatigue and enhances perceived contrast (source), so I make a point of adjusting my setup accordingly.
What’s the best way to sustain your workspace lighting?
Adopting a routine of visual inspections, cleaning, and calibration is key. For example, setting a bi-annual maintenance schedule helps catch issues early and keeps your lighting system performing at its best. Using smart tools like calibrated light meters and sensor-driven lamps ensures precise monitoring without guesswork. As LED technology advances, I predict smart integration and AI-based diagnostics will become standard, making maintenance more intuitive and less time-consuming. With smarter tools, you can ensure consistent, professional-quality lighting, minimizing surprises that could hinder productivity or content quality.
If you want to take your setup to the next level, consider investing in an integrated maintenance system that can alert you to failures before they impact your work. For now, start with simple regular cleaning and calibration—your eyes and camera will thank you. Ready to improve your workspace sustainability? Try setting a bi-annual checkup with a light meter, and notice the difference in clarity and comfort.
< >
>
Over the course of refining my workspace setup, I’ve learned that small adjustments in lighting can profoundly impact not just how I look on camera but how I feel during long work sessions. The most surprising revelation was that clipping my ring light directly to my monitor transformed my video quality and confidence almost overnight. It’s a reminder that innovation often lies in simple tweaks that challenge conventional wisdom.
Lessons That Changed My Perspective on Workspace Illumination
- Match the Light to Your Environment: No matter how expensive your gear is, improper placement or intensity can sabotage your efforts. I found that consistent, even lighting beats the brightest, most complicated setups that aren’t tuned to my space. The key lesson? Test and adapt until your light complements your workspace harmoniously.
- Simplicity Outperforms Complexity: Overly intricate lighting arrangements often cause more frustration. Clipping your ring light to the monitor proved that minimalistic solutions can deliver maximum results, demonstrating that functionality doesn’t have to be complicated.
- Every Detail Matters: Diffusers, polarizers, and calibration tools might seem minor, but they collectively elevate your visual comfort and professionalism. Investing in these little accessories pays dividends in the clarity and quality of your appearance and content.
- Routine Maintenance Is Non-Negotiable: Just like any device, your lighting setup benefits from regular cleaning and calibration. Scheduling bi-annual reviews ensures consistent performance and helps catch issues before they become problematic, ultimately saving time and energy.
- Knowledge Is Power: Understanding the nuances of color temperature, diffusion, and placement allows you to customize your setup beyond generic solutions, creating a workspace that truly works for you.
Tools That Elevate My Lighting Game
- Proper ring light positioning guides: They taught me where to aim for that flattering, shadow-free glow.
- Bias lighting strategies: Useful for reducing eye strain and improving monitor contrast.
- Innovative LED lamps: Enhancing brightness and color accuracy with minimal energy use.
- Smart desk lamp techniques: They help maintain optimal lighting without constant adjustments.
Light the Path to Better Productivity and Confidence
Remember, your workspace lighting isn’t just about appearances—it’s a foundational element of your daily comfort and professional presence. Embrace the small changes that make a big difference, like clipping your ring light to your monitor or calibrating your bias lighting. These improvements empower you to show up better, feel more confident, and perform at your best every day. What minor tweak has made the most significant impact in your workspace? Share your experience below—let’s grow together in creating perfect lighting environments for success.

About the Author
Ricardo Vargas
Director of Operations and Product Development
Ricardo Vargas is a seasoned professional in the lighting industry, currently serving as a Director of Operations and Product Development
LinkedIn Profile
I tried clipping my ring light to my monitor after reading this, and wow, what a difference it made! It’s so much easier to adjust the angle precisely, and I no longer have that awkward glare on my glasses. I think the key is the flexibility — I can change the height and direction quickly depending on my needs, which is a huge time-saver during long work sessions. I also added a small diffuser to my ring light, softening the light even further, and the results on camera look much more natural. It’s amazing how a simple tweak can boost professionalism and comfort at the same time. Has anyone experimented with different types of clips or attachments? I’d love to hear what has worked best for others, especially in compact space setups.