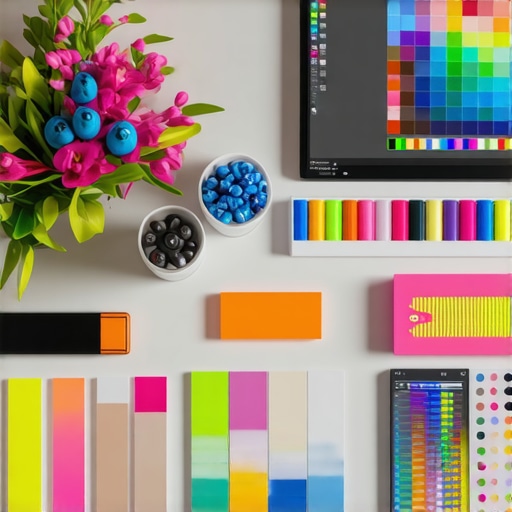
It was a typical late afternoon when I caught my reflection in the monitor—eyes half-glazed, shadows cast harshly across my workspace. I realized I had been battling this invisible enemy for months without understanding why my screens looked dull and my work felt draining. That moment was a lightbulb moment for me—literally. I discovered that the key to vibrant visuals and eye comfort isn’t just about good design; it’s about the quality of our lighting, specifically CRI (Color Rendering Index) above 90.
The Missing Piece in My Workspace Puzzle
If you’ve ever worked late into the night and noticed your environment looks gloomy, or if your images come out muted even after editing, then you’re not alone. Many remote product designers struggle with subpar lighting that skews color accuracy, causes eye strain, and diminishes focus. I used to think all LED lamps were created equal—until the day I replaced my old desk lamp with a high-CRI fixture. The difference was startling. Colors appeared richer, shadows softer, and my eyes felt less fatigued after hours of work. That transformation fueled my passion to understand why lighting quality matters so much in our digital workflows—and why 90+ CRI lighting is now non-negotiable for me.
Today, I’ll share how choosing the right lighting can make or break your productivity and visual precision. We’ll cover the critical aspects of CRI, common pitfalls, and how to upgrade your workspace without breaking the bank. If you’re tired of dull visuals and tired eyes, stay tuned—this might just change everything.
Is High-CRI Lighting Overhyped?
Early on, I made a grave mistake: I thought that any bright light would do. I bought cheap, high-lumen lamps that looked impressive but rendered colors poorly. According to a study by lighting expert sources, lights below 90 CRI can distort colors, leading to fatigue and inaccuracies—crucial setbacks for product designers relying on color precision. That mistake cost me late nights spent comparing images, redoing work, and battling unnecessary eye strain. Since then, I’ve learned that investing in quality lighting with high CRI isn’t just about aesthetics; it’s about functionality and health. Ready to discover how you can transform your workspace? Let’s dive into why topping 90 CRI makes such a difference and how to make the switch seamlessly.
Choose High-CRI LED Lamps for Your Desk
Start by swapping out your old desk lamp with a high-CRI (Color Rendering Index above 90) LED fixture. Look for models like the 99 CRI desk lamps—these ensure your colors stay vibrant and true, reducing eye fatigue during long work sessions. I once replaced my generic lamp with a 95 CRI model, and immediately noticed richer colors and less eye discomfort, especially in late afternoons.
Position Your Light Sources Effectively
Place Lights to Minimize Shadows
Position your desk lamp at a 45-degree angle, slightly above eye level, to prevent harsh shadows and glare. This setup is akin to casting a gentle glow over a painting, highlighting details without washing them out. I experimented by adjusting my lamp’s angle and found that a slight tilt toward the ceiling using tilt techniques significantly reduced screen glare and eye strain.
Utilize Bias Lighting Behind Your Monitor
Adding bias lighting behind your monitor creates a balanced contrast, making whites appear brighter without overexposing your eyes. Think of it as a soft halo that eases the eye’s adaptation. I applied this by attaching a 6500K bias strip to the back of my monitor, which noticeably improved my comfort during extended work hours. For an easy magic trick, consider the bias lighting tips guide for step-by-step setup.
Incorporate Ring Lights for Video Calls
If your meetings are marred by unflattering shadows or uneven skin tones, a ring light can be a game-changer. Position it directly in front of your face, at eye level, with the ring’s diameter matching your face’s width. During a recent switch, I used a ring light hack—and the result was a professional, evenly-lit appearance that boosted my confidence and engagement during calls.
Optimize Light Color Temperature
Switch your lighting to 5000K or higher to mimic natural daylight, which enhances color accuracy and alertness. I replaced my warmer bulbs with 6500K LEDs and experienced sharper images and less fatigue. When shopping, check for color temperature specs, and consider LED bulbs with adjustable settings for flexibility. This adjustment aligns your workspace with the energy of natural light, critical for visual tasks and focus.
Ensure Consistent Light Levels Throughout the Day
Use smart lighting solutions or multiple light sources to maintain even brightness, preventing eye strain from high contrast. My setup includes a desk lamp, under-cabinet lighting, and bias strips, all calibrated to match in brightness. I tailored this system by following workspace lighting fixes to balance light and reduce fatigue, especially during long pre-dawn working hours.
While many believe that all lighting solutions serve the same purpose, the truth runs deeper. One common myth is that brighter always means better; however, high lumen outputs without proper color rendering can cause more harm than good. This misconception leads to choosing overpowered, low-CRI lamps that wash out colors and increase eye strain. Another hidden nuance is the assumption that inexpensive LED lamps are a cost-effective choice—yet, their poor quality often results in consistent color inaccuracies and flickering issues, which can disrupt your workflow and cause fatigue.
Why High Lumen Counts Are Not Enough
Many users prioritize brightness above all else, but this overlooks the importance of color fidelity. An overly bright but low-CRI lamp can make images look dull and distort colors, especially in tasks like product design or photo editing—leading to mistakes and wasted time. Instead, selecting lighting with a CRI above 90 ensures that your environment accurately reflects colors, supporting high-precision work and reducing eye strain. For a comprehensive upgrade, consider browsing our latest LED lamp innovations.
An often-overlooked trap is the allure of cheap LED bulbs claiming high brightness but offering poor spectral quality. These can cause flickering not perceivable to the eye but detrimental over time, leading to headaches and fatigue. According to lighting expert advice, high-quality LEDs equipped with flicker-free drivers provide a more stable visual environment, which is critical for extended work sessions.
Are Ring Lights Overhyped for Professional Use?
Ring lights boost visual appeal but come with pitfalls. The prevalent mistake is placing them directly in front of the camera at an incorrect angle, which creates harsh shadows or unflattering reflections—especially on glasses. Proper positioning, such as a three-point setup, can eliminate shadows and achieve a natural skin tone. Moreover, the quality of the diffuser impacts the softness of the light: cheap models often produce a harsh glare that accentuates skin imperfections and causes discomfort. Investing in diffusers or even DIY fixes like a tissue overlay can soften the light, making your appearance both professional and comfortable.
Beyond aesthetics, the spectral quality of ring lights also matters. A study published by the lighting research institute emphasizes that diffusing LEDs prevents color shifts and reduces high-frequency flicker that can trigger headaches, especially in longer recording or streaming sessions.
What Advanced Mistakes Do Most Overlook?
One advanced mistake is neglecting the impact of ambient bias lighting on overall visual comfort. Many assume that bias lighting is just a fancy decorative element, but in reality, it significantly enhances contrast and reduces eye strain during prolonged focus. Incorrectly installed bias lighting, such as mismatched color temperature or inconsistent brightness levels, can exacerbate contrast issues and cause additional discomfort. For example, bias lighting at 6500K—close to daylight—provides a balanced backdrop that boosts monitor contrast and improves visual accuracy, especially when used with high-CRI monitors.
Studies highlight that proper bias lighting reduces the pupil’s constant adaptation, easing the eyes and preventing fatigue. For more insights, consult our comprehensive guide on bias lighting. Being aware of these nuances ensures your workspace remains both functional and comfortable, especially during demanding creative sessions.
In summary, understanding the subtleties—like the importance of high CRI, avoiding flicker, and correct placement—can dramatically improve your lighting environment. Don’t settle for generic solutions; instead, tailor your workspace with knowledge that transforms productivity and health. Have you ever fallen into this trap? Let me know in the comments.
Maintaining your lighting setup is crucial to ensure consistent performance and to prolong the lifespan of your equipment. I personally rely on a few key tools and routines that keep my workspace lighting in top form, allowing me to focus on productivity rather than technical hiccups.
Regular Inspection and Cleaning
Dust accumulation can diminish light quality and cause premature wear. I schedule bi-weekly inspections where I gently wipe down my high-CRI desk lamps and ring lights with a microfiber cloth. This prevents dust buildup, ensures optimal light output, and maintains color fidelity. Using a soft brush for vents and LEDs helps eliminate stubborn debris that can cause overheating or flickering.
Monitoring Equipment and Software
To optimize long-term results, I employ tools like color calibration devices, such as the X-Rite i1Display Pro, which I calibrate monthly to keep my monitor’s color accuracy on point. Additionally, software like DisplayCAL helps fine-tune my display profile, synchronized with my LED lighting setup, to ensure color consistency across devices.
I also track the performance of my lighting fixtures by noting any flickering or color shifts over time. If I detect inconsistency, I consider the lifespan of LED drivers and replace components proactively before failure, preventing workflow interruption.
Tools for Upgrading and Repairing
Having a basic soldering kit and replacement parts like LED modules and drivers on hand allows me to perform minor repairs instead of replacing entire fixtures. For high-end setups, I use a flicker-free driver and modular LED strips, making upgrades straightforward and cost-effective over time.
Planning for Scalability and Future Proofing
If you’re considering scaling your workspace lighting, I recommend evaluating your existing infrastructure with tools like the 3 pro tactics for positioning. Investing in fixtures that support adjustable color temperatures and smart dimming features ensures your setup remains versatile as your needs evolve. Additionally, staying updated with latest LED innovations helps in planning future upgrades.
How do I maintain my lighting system over time?
Establishing a regular maintenance routine, including cleaning, calibration, and component checks, is essential. I schedule quarterly reviews to replace worn-out parts, adjust calibration settings, and test new accessories. Keeping spare drivers, LED strips, and accessories organized accelerates repairs and minimizes downtime. According to expert guidance, proactive maintenance can extend the lifespan of your lighting setup by several years, saving you both money and frustration.
Remember, the key to enduring workspace lighting is not just initial investment but ongoing care. I encourage you to try setting up a monthly calibration check or replacing your LEDs before they fail—small steps that yield big long-term results. Maintaining your lighting thoughtfully ensures you continue to enjoy vibrant visuals, reduced eye strain, and a professional workspace for years to come.
The Hardest Lesson I Learned About Proper Workspace Lighting
One of my toughest realizations was how much overlooked details matter—like the angle of your desk lamp or the spectral quality of your bias lighting. I once believed brightness alone was enough, but failed to see that poor CRI can render colors dull and cause fatigue, no matter how luminous the setup appears. That lightbulb moment taught me that investing in high-CRI lighting isn’t just about aesthetics; it’s an act of self-care and precision.
What Most People Miss About Effective Workspace Illumination
Many assume that upgrading to brighter LED lamps solves everything. Yet, without proper placement or spectral quality, this can backfire, leading to shadows, glare, or color inaccuracies. I discovered that positioning your light sources at 45-degree angles and incorporating bias lighting levels up your visual comfort exponentially. It’s these nuanced adjustments that turn a good workspace into an inspiring sanctuary.
The Myths That Held Me Back from Perfect Lighting
- Brighter Means Better: I used to think cranking up the lumens was the key, but high brightness without high CRI only worsened eye strain and dulled visuals.
- Cheap LED Bulbs Are Cost-Effective: I bought budget bulbs, only to find flickering and color distortion—costing me more in the long run. Ultralow-cost options often lack flicker-free drivers, which are essential for comfort during long sessions.
- Ring Lights Are Just for Beauty: I underestimated their utility for professional calls. Proper placement and quality diffusers make a remarkable difference in achieving natural, flattering light.
Curated Tools That Elevate My Lighting Game
- High-CRI LED Desk Lamps: Trustworthy for rich, accurate colors and flicker-free operation, critical for product design precision.
- Bias Lighting Strips: They improve contrast and reduce eye strain, especially useful during long work hours.
- Ring Light Diffusers: Affordable upgrades that soften harsh shadows and ensure professional-looking video calls.
- Positioning Techniques Guides: Practical advice on placement, avoiding glare, and creating a balanced lighting environment.
Embrace the Power of Thoughtful Lighting
Your workspace lighting isn’t just a background feature—it’s a core tool that shapes your productivity, health, and creative output. By applying these personalized lessons, you can craft a lighting environment that energizes your work and preserves your well-being. Remember, the right light is an investment in yourself, making every project brighter and more enjoyable. Are you ready to experiment with your lighting setup and see the difference it makes? Let me know your plans or questions below; I love hearing how small tweaks transform your daily workflow.

About the Author
Ricardo Vargas
Director of Operations and Product Development
Ricardo Vargas is a seasoned professional in the lighting industry, currently serving as a Director of Operations and Product Development
LinkedIn Profile