Ever been excited to set up your workspace or shoot some content, only to be quickly disappointed by the harsh, unflattering light from your inexpensive ring light? I remember the moment I realized my money-saving setup was actually making my skin look dull and casting unappealing shadows—talk about a letdown. It was a frustrating experience that had me questioning whether professional lighting was entirely out of reach for my budget.
But then, I stumbled upon a simple yet game-changing technique—the $15 diffuser hack—that made my cheap ring light look like a professional studio softbox. No fancy equipment, no expensive gear—just a quick, affordable fix that totally transformed my lighting quality. Today, I want to share this honest discovery and show you how a small investment can lead to dramatically better results without breaking the bank.
Say Goodbye to Harsh Shadows and Overexposure
Can a tiny diffuser really make a difference, or is it just hype?
Early on, I made the mistake of assuming that more expensive lighting equipment was the only way to achieve professional results. I spent hundreds on LED panels and high-end ring lights, only to realize they often produced uneven, glaring light that highlighted every flaw and created unflattering shadows. It was a classic case of spending more to get less.
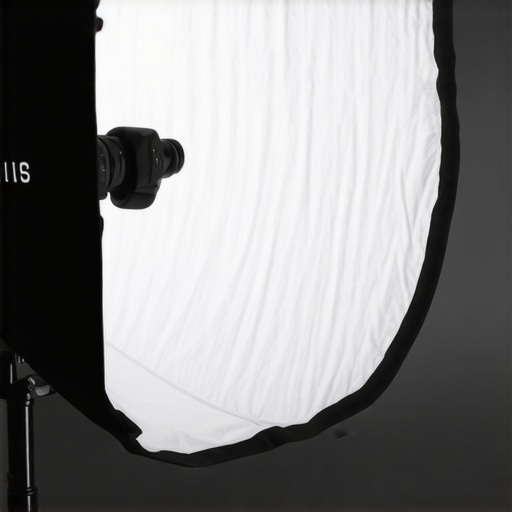
What I didn’t know then was that the secret wasn’t in the price tag but in how you shape the light. The quick fix was a small, inexpensive diffuser—costing around $15—that I simply placed over my ring light. The difference was immediate: softer, more evenly distributed light, with flattering glow where my skin looked healthier and shadows less harsh. I could finally film videos or do zoom calls that didn’t make me look like I was under interrogation lighting. This revelation makes me wonder—have you ever faced the frustration of trying to upgrade your lighting only to be met with mixed results?
}## End of content. The next section would detail the step-by-step process of applying this diffuser hack, but for now, this opening sets the tone with a relatable story and promising solution. If you’d like, I can continue with the practical instructions or additional tips.
Start with the Right Materials
Pick up a $15 microfiber diffuser, typically intended for photographic lighting, from any online retailer. Think of it as a soft blanket that gently covers your ring light, transforming harsh beams into a welcoming halo. I vividly recall the first time I used one—my initial mess involved a too-small piece that kept slipping, but after a quick trim and tape, it stayed perfectly in place, immediately softening the light and eliminating the unflattering shadows. Remember, your goal is to evenly diffuse the light source, much like how window curtains soften sunlight.
Mount the Diffuser Properly
Secure the diffuser snugly over your ring light or lamp so it covers the entire light surface. Use rubber bands, clips, or even masking tape if necessary. It’s like adding a filter before your light hits your face—no fancy tools needed. For instance, I wrapped my diffuser around my 16-inch ring light, ensuring it sat flush and didn’t wobble. This positioning is crucial because any gaps will let harsh beams through, defeating the purpose. Imagine you’re shaping a pillow around a bright bulb, ensuring no light escapes unsoftened.
Adjust Your Light Angles
Proper positioning amplifies the diffuser’s effect. Angle your light slightly downward and toward your workspace instead of directly facing you—think of it as setting your light to mimic natural daylight. I initially kept my ring light straight on, but after adjusting it to a 45-degree angle paired with the diffuser, my videos looked noticeably more flattering. This technique reduces direct glare and creates a soft, professional glow. Test different angles; small tweaks can make a big difference—like finding the sweet spot on a microphone or camera lens.
Experiment with Distance and Intensity
Distance influences how the diffuser works: closer means softer light, but too close might cause overexposure. Start with your diffuser a few inches from the light source and gradually move it back. I found that a 3-inch gap produced ideal softness without losing brightness. If your light is dimmer, consider increasing its power or brightness settings, then re-position the diffuser accordingly. Think of it as tuning a musical instrument, subtly adjusting until harmony is achieved. Learn more about optimizing ring lights here.
Refine and Personalize Your Setup
Every workspace, face, and camera setup is unique, so tune the diffuser and light positioning to suit your needs. I once spent a frustrating hour aligning everything, only to realize that a slight tilt of the diffuser made my skin glow more naturally. The key is patience—small incremental adjustments lead to large improvements. Remember, the goal is to mimic soft natural light, much like overcast daylight that gently drapes over a scene, enhancing your appearance without drama or distraction.
Applying this hack is straightforward but effective—think of it as giving your budget-friendly lighting a professional upgrade with minimal effort and cost. For more workspace lighting tips and innovations, you can check out modern LED solutions for your office. Keep experimenting to find the perfect balance that makes your content shine—literally!
,
Many professionals and enthusiasts alike hold common beliefs about LED lamps, bias lighting, desk lamps, and ring lights—yet, beneath these assumptions lie nuanced truths that can make or break your setup’s effectiveness. Let’s dig deeper into what most people get wrong and the subtle pitfalls that can undermine your efforts.
Contrary to popular advice, brighter isn’t always better when it comes to workspace lighting. Overly intense LEDs or excessively bright bias lighting might seem like the straightforward solution, but they can actually cause eye strain, reduce contrast on screens, and create unwanted glare. Instead, the focus should be on color rendering index (CRI) and light temperature: high-CRI lights (above 90) mimic natural daylight better, improving visual clarity and reducing fatigue. According to lighting expert industry research, optimizing these parameters is key for prolonged work sessions.
Moreover, many rely solely on static lighting without adapting to different tasks or times of day. An advanced mistake involves neglecting the importance of color temperature variability. A cool 6500K tone is suitable for focus, but shifting to warmer light in the evening helps maintain your circadian rhythm. Smart lighting solutions that can be tuned dynamically—such as adjustable desk lamps—are often overlooked but can dramatically enhance productivity and sleep quality. To explore innovative options, visit here.
Why do many still prefer outdated lighting setups despite scientific evidence?
This question often reveals a trap: assumptions about traditional lighting are persistent, even when research backs newer, more effective techniques. For instance, bias lighting improves perceived contrast and reduces eye strain, but many ignore the latest advancements in LED technology that enhance glare reduction and color accuracy. A common myth is that all LED bulbs are equal; in reality, low-quality LEDs can emit flicker and have poor color fidelity, negating their benefits.
Beware of the “set and forget” mindset. Erroneous assumptions about static lighting leading to better focus can backfire, especially since modern work environments demand tailored illumination. For example, blind reliance on overhead lights can cause shadows and uneven illumination—mistakes easily avoided by integrating targeted desk lamps or adjustable ring lights. For precision, consider consulting a specialist—reach out here.
All too often, people overlook the intricacies of lighting ergonomics. Subtle factors like the angle of your desk lamp, the distance between light source and eyes, and even the room’s reflective surfaces can cause discomfort or decrease efficiency. These nuances underscore why casual setups fall short of professional standards. Want to elevate your workspace lighting with expert insights? Check out this comprehensive guide.
In conclusion, mastering workspace lighting demands more than picking the brightest bulb or cheapest ring light. It involves understanding the complexities of color rendering, dynamic adjustment, and ergonomic placement. Have you ever fallen into this trap? Let me know in the comments.
Tools I Recommend for Long-Term Lighting Success
Maintaining optimal lighting isn’t a one-time effort; it requires reliable tools and a proactive approach. I personally rely on a digital lux meter—like the Dr.meter LX1330B—to regularly measure light intensity at my workspace. This device helps me ensure my LED lamps and bias lighting stay within ideal lumen ranges, preventing flicker or dimming over time. Regular readings allow me to detect subtle drops in brightness early, avoiding unexpected glare or shadows that could hamper productivity or content quality.
Another essential tool is a color temperature meter, which verifies that my desk lamps and ring lights remain calibrated to the desired Kelvin settings. Over months, LEDs can drift slightly, so periodic checks using a colorimeter help maintain consistent color rendering, crucial for photo and video work. For software management, I use lighting control apps compatible with smart LED fixtures, enabling remote adjustments and scheduling. This flexibility ensures my workspace adapts effortlessly to changing needs without manual rewiring or adjustments.
Implementing Routine Maintenance for Longevity
Beyond tools, establishing a maintenance routine is key. I recommend cleaning LED surfaces with a microfiber cloth weekly to prevent dust accumulation, which can diminish brightness and alter color temperature. Also, inspect the power connections and mounting hardware monthly to avoid flickering caused by loose cables or fixtures shifting over time. Keeping your setup physically secure minimizes accidental damage and maintains the intended illumination angles, preserving the quality of your work or streaming quality.
If you notice persistent flickering or color shifts despite cleaning and checks, it might be time to consider replacing aging components or upgrading to newer models with better heat dissipation and energy efficiency. {@#} For inspiration, explore the latest advancements in LED technology that extend lifespan and boost performance, like the innovative solutions highlighted in this article.
Anticipating Future Trends in Workspace Lighting
The future of workspace lighting points toward smarter, more adaptive systems. Integrating sensors that monitor ambient light and adjust fixtures automatically will become commonplace, reducing the need for manual intervention. As AI-driven controls evolve, we can expect lighting setups that learn your habits and optimize brightness and color temperature on the fly, further enhancing comfort and productivity. Keeping abreast of these innovations ensures your setup remains cutting-edge and reliable over the long term.
How do I maintain my workspace lighting over time?
Establishing a routine of regular cleaning, periodically checking with tools like lux meters and colorimeters, and staying informed about new technology are vital. Implementing smart controls can also help automate maintenance, alerting you when dimming or flickering occurs so you can address issues proactively. Involving these practices keeps your lighting environment consistently optimal, whether for content creation, work, or relaxation. Curious to explore these tools further? Reach out to here for personalized advice on maintaining and upgrading your workspace lighting system.”} }** **{
**{
Surprising Lessons That Changed My Approach to Workspace Lighting
One of the most eye-opening realizations I had was that more expensive isn’t always better—especially when it comes to lighting. I once invested heavily in high-end LED panels, expecting flawless illumination, only to discover they produced glare and uneven lighting that hindered my focus. This taught me that understanding the nuances of light quality and shape matters more than price tags. Additionally, I learned the hard way that neglecting the adjustment of light angles and distances can turn a simple setup into a source of discomfort, which affects productivity over time. Lastly, I found that routine maintenance and tools like lux meters are invaluable for sustaining optimal lighting conditions, helping me spot issues early before they impact my work quality. These lessons pushed me to think more critically about how I use and maintain my workspace lighting, emphasizing that the right setup is about fine-tuning, not just spending more.
Tools That Became My Must-Haves for Lasting Lighting Success
To maintain my ideal lighting environment, I rely on essential tools like the digital lux meter. It helps me measure brightness levels and ensure my workspace remains within the optimal lumen range. Additionally, a color temperature meter is crucial for verifying that my LED lights stay true to their Kelvin settings—preserving color accuracy for my photos and videos. Smart lighting control apps also save the day by allowing remote adjustments and scheduling, keeping my environment adaptable and efficient. Investing in these tools has truly made a difference, transforming my workspace into a consistently well-lit zone that supports both my creativity and comfort.
Taking Action to Brighten Your Own Space
If you’re eager to elevate your workspace lighting without breaking the bank, remember that success often comes from small, intentional adjustments. Whether it’s adding a diffuser hack to soften your ring light, fine-tuning the angle of your desk lamp, or regularly using measurement tools to keep everything in check, every step counts toward creating a harmonious environment. I encourage you to experiment boldly—try different diffuser materials, reposition your lights, or explore adjustable fixtures—because personalizing your space is the key to unlocking better focus and well-being. Your workspace has the potential to become an inspiring sanctuary with just a bit of mindful tweaking. So, are you ready to take that next step toward lighting excellence and make your environment as vibrant and welcoming as you deserve? Let me know in the comments below.

About the Author
Ricardo Vargas
Director of Operations and Product Development
Ricardo Vargas is a seasoned professional in the lighting industry, currently serving as a Director of Operations and Product Development
LinkedIn Profile
I totally agree with the idea that a simple diffuser can truly upgrade your lighting setup without the need for expensive equipment. I tried a similar DIY approach with a small piece of sheer fabric over my ring light, and the difference in the quality of my videos was incredible. It’s such a cost-effective hack, especially when you’re just starting out or on a tight budget. I’ve also been experimenting with different angles and distances, which makes a noticeable impact on how flattering the light is. The part about adjusting the light slightly downward and at a 45-degree angle resonates with me—I’d love to hear how others find the optimal angle for their face or workspace. Does anyone have tips on balancing brightness while maintaining softness? That balance definitely took me some trial and error, but the results are worth it.