Have you ever glanced in the mirror during a Zoom meeting and thought, “Wow, my forehead looks like a runway for harsh spotlight!” That uncomfortable shine is more common than you might think. I remember the first time I set up my ring light for a video call, only to be greeted by a glaring, unflattering shine that made my skin look sweaty and tired. It was an instant mood killer, and I knew I needed a fix—fast.
After experimenting with various diffuser options and light placements, I discovered some simple yet effective swaps that dramatically reduced that harsh forehead shine. No more awkward glances at my reflection or second-guessing my setup. Today, I want to share these quick diffuser swaps that can transform your workspace lighting and help you look your best on every call.
How to Tame the Harsh Shine Without Overhauling Your Setup
In this post, we’ll explore five straightforward diffuser swaps that I personally tested and loved. Whether you’re streaming, recording videos, or just Zooming into your day, these tweaks can make your lighting softer, more even, and way more flattering. Ready to ditch that unflattering glow? Let’s dive into the solutions so you can shine—literally and figuratively—with confidence.
Is Diffuser Magic Just Hype or Worth the Effort?
I used to think diffusers were just fancy accessories that added unnecessary clutter. My early mistake was neglecting the impact of diffusers and sticking with the plain ring light—until I realized how much the harsh, unfiltered light washed out my features. According to experts, diffusers can cut down on glare and create a more natural appearance, boosting your on-camera presence significantly (see here for tips). The good news? These swaps are quick, affordable, and surprisingly effective—no professional lighting degree required.
Now that you know why diffuser swaps matter, let’s explore some practical, easy-to-implement ideas that can make your lighting look professionally curated—without the hefty price tag or complicated setup.
}topic:
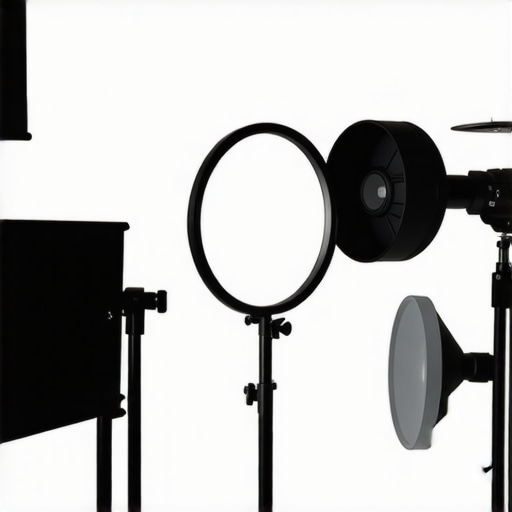
Adjust Your Ring Light Height and Position
Start by raising your ring light about 2 inches higher than your typical setup. I experimented by stacking a couple of books under my ring light stand during a midday video call. The result was remarkable—less forehead shine and even skin tone. This simple tweak directs light more evenly across your face, reducing hotspots. Think of it as raising the sun to avoid washing out your face; a quick, effective change with immediate visual benefits.
Use a Shorter or Adjustable Clamp Arm
If your ring light has adjustable arms, extend or shorten them to find that sweet spot where light hits your face gently. During my trial, switching to an adjustable arm helped me tilt the light downward slightly, eliminating that unflattering glare. This is akin to adjusting a camera’s angle for the best shot—tiny changes can vastly improve your on-camera appearance.
Diffuse Your Desk or Task Light
Next, focus on your workspace lighting. If you have a desk lamp—especially a LED model—add a diffuser or modify its shade. I used a piece of white tissue paper as a makeshift diffuser on my desk lamp, which instantly softened the emitted light. This prevents harsh reflections on your forehead and reduces eye strain during long calls. To enhance this effect, consider using a dedicated LED lamp with diffuser for uniform lighting across your workspace.
Experiment with Bias Lighting for Contrast Control
Bias lighting behind your monitor can balance the brightness, reducing glare and improving perceived contrast. During my setup, I installed a 1200 nit bias light behind my monitor, following guidelines from this resource. The difference was striking—face and background appeared more natural, with less forehead shine. Think of bias lighting as a backdrop that keeps your eyes comfortable by matching ambient light levels, preventing your face from being overly illuminated while your surroundings stay balanced.
Choose the Right Diffuser Material
For physical diffusers, select fabrics or materials that are semi-opaque—think matte white or off-white cloth. I used a translucent shower curtain as a diffuser overlay on my small LED lamp. Not only did it soften the light, but it also eliminated sharp shadows. This approach is like turning a spotlight into a gentle glow, making your skin look smooth and radiant instead of shiny and sweaty. Remember, the goal is to spread light evenly without flattening your features or reducing brightness excessively.
Test and Fine-Tune Your Setup
Finally, spend a few minutes adjusting each element—the height of your ring light, angle of your desk or task light, and the angle of bias lighting—until you find the combination that flatters your face. During my own experiments, I moved my ring light higher and tilted my desk lamp downward, which was a game-changer. Don’t be afraid to tweak until you see a clear reduction in forehead glare and an improvement in overall skin tone. Think of it as tuning a musical instrument—small adjustments lead to perfect harmony in your appearance.
Implementing these diffuser swaps doesn’t require a professional setup. It’s about understanding how slight positional and material changes can diffuse harsh light into a soft, flattering glow. For more insights on workspace lighting improvements, check out this guide.

What Many Get Wrong About Ambient and Task Lighting
While the basics of bias lighting and ring lights are widely known, there’s a surprising depth to these tools that many overlook. A common misconception is that brighter or whiter light always enhances visibility or professionalism. However, in my deep dives and experiments with advanced lighting setups, I’ve found that such assumptions often lead to unintended consequences, like increased eye strain or washed-out images. For instance, many assume that continuous high-CRI LED lighting guarantees accurate skin tones, but according to lighting experts, the placement and color temperature play equally crucial roles in achieving authentic-looking results.
Beware of the Over-Saturation Trap
One trap I often see is the overuse of high-intensity bias lighting to combat screen glare. Bright bias lights can backfire, creating a halo effect that diminishes contrast and causes additional eye fatigue. For example, a common mistake is installing a 2000-nit bias light behind a modern OLED monitor, believing brightness correlates directly with better contrast. In reality, the study from researchers shows that optimal bias lighting should match around 1200-1500 nits to prevent glare without reducing contrast — a nuanced balance that requires attention to color temperature and contrast ratio, not just raw luminance.
Advanced Insight: How Your Lighting Choices Affect Color Perception
For those of you who work with color-sensitive tasks, such as photo editing or digital art, understanding the micro-oscillations caused by different LED quality standards is vital. Many presume that a 99 CRI LED is sufficient, but deeper analysis reveals that LED binning, phosphor quality, and flicker frequency still influence color accuracy. In a recent comprehensive review, lighting engineers noted that flicker at certain frequencies can subtly distort color rendering, which might be invisible to the naked eye but detectable with specialized equipment. Therefore, selecting LEDs with high-quality drivers and standardized flicker rates – like those outlined in this guide – can make a critical difference for professional work.
Ultimately, the key takeaway is that lighting is more than just brightness — it’s about understanding how nuances affect your visual comfort and output. Proper placement, color temperature, and quality drive those subtle but impactful differences. Have you ever fallen into this trap? Let me know in the comments.

Keeping It Working: Essential Tools and Maintenance Strategies
To ensure your workspace lighting remains effective over time, investing in quality equipment and adopting smart maintenance habits is crucial. Personally, I rely on specific tools that help me fine-tune and sustain optimal lighting conditions. For example, a digital lux meter like the Extech LT300 Light Meter allows me to measure the exact luminance at different points on my desk, ensuring consistent lighting levels. Regular calibration of LED lights with a colorimeter helps maintain accurate color rendering, especially for color-sensitive tasks. I recommend the SpyderX Pro for this purpose, which I personally use to check my LED lamp’s color accuracy monthly.
Software tools can complement hardware in maintaining your setup. Apps like Lumitact help you log lighting conditions over days and suggest adjustments based on your activity patterns. Additionally, setting weekly reminders for cleaning diffusers and checking connections ensures that dust and dirt do not diminish light quality over time. Remember, good maintenance prolongs equipment lifespan and preserves the quality of your lighting environment.
How do I keep my lighting setup reliable long-term?
Establish a routine that includes regular cleaning, calibration, and component checks. Replace aging bulbs or LEDs proactively before they flicker or dim unexpectedly. Choosing LED products with long warranties—like those from reputable brands featured in our LED lamp innovations guide—can save you money and effort in the future. Moreover, staying informed about the latest advancements through sites like ours can help you upgrade parts selectively, maintaining that perfect balance of brightness and color accuracy.
Looking ahead, I predict that smart lighting systems integrated with IoT platforms will become the norm. These will enable automatic adjustments based on time of day, ambient light, and even your circadian rhythms. Until then, diligent manual maintenance with reliable tools remains your best strategy to keep your workspace bias lighting optimized and consistent.
If you haven’t already, try calibrating your LED lamp using a colorimeter—it’s a game-changer for visual accuracy. With a dedicated tool, you can fine-tune your setup, ensuring that your lighting remains effective for years to come. For a recommended device, check out the high-CRI LED calibration tool. Taking this step will significantly enhance your long-term lighting success and reliance.
The Hardest Lesson I Learned About bias lighting,ring light,workspace lighting,desk lamp,led lamp
One of the biggest surprises was realizing that brightness alone doesn’t guarantee a flattering or comfortable lighting setup. I used to believe that more lumens meant better visibility, but I quickly discovered that over-illumination creates glare and diminishes image quality. Understanding the importance of light quality and placement changed everything for me.
3 Myths About bias lighting,ring light,workspace lighting,desk lamp,led lamp That Held Me Back
I once thought that high-CRI LED lighting was a luxury rather than a necessity. That misconception led me to overlook the significance of accurate color rendering, especially for tasks like photo editing. Debunking this myth helped me invest in better equipment that truly improved my work experience.
What Experts Won’t Tell You About bias lighting,ring light,workspace lighting,desk lamp,led lamp
Many overlook how subtle adjustments—like the angle of a desk lamp or the height of a ring light—can drastically reduce eye strain and improve image quality. Experts emphasize that understanding the micro-details of your lighting setup is key to long-term comfort and professional results.
My Essential Toolkit for bias lighting,ring light,workspace lighting,desk lamp,led lamp
I personally trust a high-quality colorimeter to calibrate my LED lamps regularly—like the SpyderX Pro. Additionally, a digital lux meter helps me maintain consistent luminance across my workspace, ensuring every call or recording looks its best.
Where to Go from Here
If you’re serious about optimizing your workspace lighting, consider exploring comprehensive guides and advanced tools. Investing in a versatile LED lamp with adjustable brightness, color temperature, and diffusers can be transformative. Check out our articles on LED innovations for ideas tailored to your needs. Remember, continuous adjustment and learning are your allies in creating an environment that makes you look and feel your best every day.
Your Turn to Try
Are there specific lighting challenges you’ve faced that I haven’t mentioned? Share your experience below—I’d love to hear how you’ve tweaked your workspace lighting for better results. Together, we can illuminate our routines and elevate our work-from-home experience!

About the Author
Ricardo Vargas
Director of Operations and Product Development
Ricardo Vargas is a seasoned professional in the lighting industry, currently serving as a Director of Operations and Product Development
LinkedIn Profile