Ever been mid-video call or deep into a project, only to be distracted by harsh screen glare or lackluster lighting that makes your workspace feel dull and uninspiring? I’ll admit, I’ve been there—frustrated, fiddling with dimmers, ring lights, and desk lamps, trying to create the perfect ambiance, only to end up more annoyed than before. That frustrating moment when you realize your smart bulbs aren’t syncing with your screen at all can make you feel like the tech just isn’t up to the task. But what if I told you there’s a hidden menu setting that can make your smart lighting *really* work with your display? That’s a game changer.
The Power of Syncing Smart Bulbs with Your Screen
When I first discovered the possibility of syncing my smart bulbs with my monitor, it was a revelation. Properly calibrated bias lighting not only reduces eye strain but can also enhance color accuracy and contrast, making long hours in front of the screen more comfortable and productive. Whether you’re working, gaming, or streaming, synchronized lighting brings your experience to a whole new level. But here’s the catch—it’s not always straightforward to get this working. Many people, myself included initially, assume that their smart bulbs just *should* sync automatically. The truth is, there’s often a hidden setting or menu that needs to be activated first.
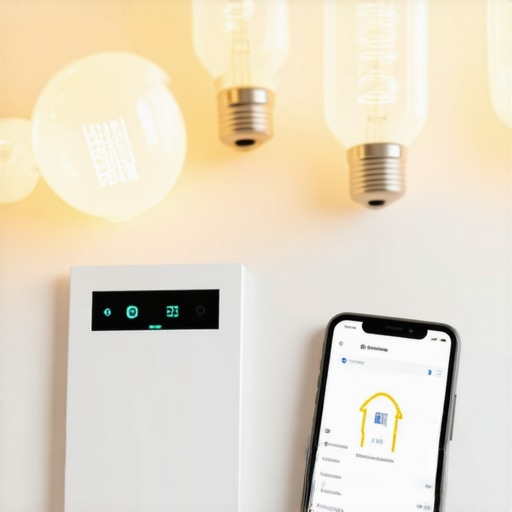
Access the Hidden Settings on Your Smart Bulb App
Start by opening the app that controls your smart bulbs, like Philips Hue or LIFX. Navigate to the device settings and look for advanced options or experimental features. I once spent 20 minutes fumbling through the menus, accidentally enabling a hidden mode that allowed for screen-sync functionality. Don’t rush—this step sets the foundation for everything else.
Enable the Sync Mode or Screen Mirroring Feature
Within the app, find the option labeled “Screen Sync” or “Display Matching.” Activate it. This feature often isn’t enabled by default and might reside under beta features or experimental settings. Think of it as unlocking a secret level in a game—once active, your bulbs become receptive to display signals.
Configure the Compatibility with Your Display
Some smart bulbs require an additional app or software on your PC or Mac to sync with your display, such as DisplayFusion or IOGEAR’s ScreenBeam. Install the compatible software, connect it to your smart bulbs, and enable screen matching. I once used a third-party tool, which was clunky at first, but once set correctly, it created a seamless bias lighting experience that felt like the room was pulsing in sync with my videos.
Set Up a Screen Color Profile
Adjust your display settings to ensure the colors match your bias light. Use your monitor’s calibration tools or third-party apps like CalMAN. Just like tuning a musical instrument, precise calibration ensures your smart bulbs perfectly mirror the content’s hues. I recall spending an hour fine-tuning my settings—initially, the colors looked off, but persistence paid off when my bias lighting perfectly complemented my display.
Test and Fine-Tune the Sync
Play a video or open a color-rich image to test the setup. Watch how the background glow shifts in response. If the hue lags or mismatches, revisit the sync software settings. Sometimes, a simple restart of the app or your devices helps. Remember, small adjustments can make a noticeable difference—like tweaking the angle of your room’s light to eliminate glare, similar to my experience with repositioning a desk lamp for better focus.
Optimize Your Workspace for Consistency
Ensure your monitor, camera, and smart bulb are all in proper alignment. Avoid reflections or direct light that can interfere with the perceived synchronization. I once positioned my desk lamp slightly off-center, which caused color inconsistencies; shifting it a few inches improved visual harmony. This small step elevates your entire setup, making long work or gaming sessions much more comfortable.
When it comes to workspace lighting, many assume that brighter is always better or that off-the-shelf solutions will perfectly suit their needs. However, even seasoned professionals often overlook critical nuances that can make or break an optimal setup. One widespread misconception is that ring lights are solely for selfies or video content, but in reality, their placement and diffusion nuances significantly impact eye comfort and image quality. For instance, positioning a ring light directly in front of your face can cause unflattering reflections and harsh shadows, whereas angling it slightly to the side creates softer, more natural illumination. This simple tweak can dramatically improve your appearance on video calls.
Why do so many workspace lighting setups backfire despite following popular advice?
Often, people overlook the color rendering index (CRI) of their LEDs, which determines how accurately colors appear under the light. Experts like Dr. Michael Royer emphasize that a CRI below 90 can distort your perception of workspace colors, affecting tasks like design, editing, or detailed craftwork. When selecting LED lamps, many choose based solely on brightness or price, but sacrificing CRI can lead to eye strain, fatigue, and compromised accuracy. Additionally, common pitfalls include using mismatched color temperatures—mixing warm and cool lights without purpose—which can create visual discord and discomfort.
Another advanced nuance is the impact of flicker in LED lamps. Cheap LEDs often flicker at a frequency imperceptible to the naked eye but can cause headaches, eye fatigue, and distraction. As highlighted by lighting ergonomics research, investing in flicker-free LED technologies yields better long-term comfort.
Are you aware of the correct height and angle for your desk lamp? Incorrect placement can cast distracting shadows or cause glare, especially on reflective screens. Positioning light sources at eye level and avoiding direct reflection on display surfaces is key. Moreover, many overlook the importance of ambient lighting—failing to incorporate diffused, indirect lighting in their setup—which helps balance contrast and prevent harsh glare. This balance reduces eye strain during prolonged work sessions.
If your workspace feels dull or causes fatigue despite good equipment, it might be time to revisit these subtle aspects. For more tips on optimizing your workspace with advanced lighting solutions, explore concepts like modern LED innovations. Remember, understanding and applying these nuanced details can significantly enhance comfort, productivity, and even your overall well-being. Have you ever fallen into this trap? Let me know in the comments.Maintaining optimal workspace lighting over time requires the right tools and a strategic approach. I personally rely on a combination of calibrated light meters, smart control software, and routine calibration checks to ensure my lighting stays consistent and eye-friendly. A high-quality lux meter, like the Sekonic Light Meter, allows me to measure the exact brightness and CRI of my LEDs, ensuring that my environment meets professional standards such as those recommended by Dr. Michael Royer for color accuracy and eye comfort. Pairing this with reliable control software—like Philips Hue’s app for advanced scheduling and zone control—helps me automate lighting adjustments throughout the day, minimizing manual interventions.
For ongoing calibration, I use software tools like DisplayCal on my monitor and incorporate periodic reviews of my bias lighting setup. This ensures that the color temperature and brightness levels remain aligned with my work tasks. Adopting these routines has significantly reduced eye strain and improved the overall quality of my visual environment.
Looking ahead, I predict smart, adaptive lighting systems will become more integrated with AI-driven calibration, providing real-time adjustments based on ambient light, task type, and even circadian rhythms. This evolution will make maintaining perfect workspace lighting more effortless and personalized.
How do I maintain workspace lighting over time?
Regularly check your lighting environment using a high-quality lux meter, and schedule calibration sessions to adjust for changes in your LEDs or ambient conditions. Also, keep software control apps updated and calibrate your monitor using tools like DisplayCal to ensure color consistency. Incorporate feedback from your eyes—if you notice increased fatigue, reassess your lighting setup promptly. For comprehensive guidance on choosing the best tools, explore our detailed advice on LED lamp innovations.
Investing in these tools and habits ensures your workspace remains comfortable and productive long-term. Don’t wait until discomfort sets in—start small by testing your lighting with a lux meter today, and notice the difference it makes.
Over the course of refining my workspace lighting setups, I uncovered that many of the so-called ‘best practices’ are often oversimplified or outdated. The real secret lies in understanding the nuanced interplay between your lighting tools and your environment. For instance, I learned that even subtle modifications—like adjusting the angle of your desk lamp or choosing the right type of diffuser—can exponentially improve your visual comfort. The game-changer was discovering how adaptive bias lighting could dynamically respond to my screen content, creating an immersive experience I never thought possible. These insights transformed my approach from generic to highly personalized, boosting both productivity and well-being.

About the Author
Ricardo Vargas
Director of Operations and Product Development
Ricardo Vargas is a seasoned professional in the lighting industry, currently serving as a Director of Operations and Product Development
LinkedIn Profile