Have you ever experienced that sinking feeling during a video call when your face looks oddly flat, your skin tone appears dull, or your eyes seem to glow unnaturally? I used to think it was just my camera’s fault, but it turns out, something much simpler—yet surprisingly overlooked—was the culprit: the position of my ring light. Like many, I believed that placing my ring light directly behind my camera would produce the perfect, evenly lit shot. But that assumption led to more shadows, unflattering reflections, and an overall unprofessional appearance. It was a lightbulb moment when I realized I had been doing it all wrong.
Why Positioning Your Light Behind the Camera Is a Common Mistake
In my early days of setting up a home studio, I followed the popular advice to position my ring light directly behind the camera lens. It seemed logical—after all, isn’t that how studios do it? The result was underwhelming. Instead of a smooth, flattering glow, my face was plagued with harsh shadows and an uneven complexion. I didn’t understand why until I read an insightful article highlighting how light positioning can dramatically influence on-camera appearance. Studies remind us that lighting influences perceived professionalism and credibility, making correct placement essential for those of us working remotely or creating content.
The mistake I made early on was thinking that the brightest, most centered light would automatically look best. But the reality is, the right light angle and height can make a world of difference. If you’ve faced similar issues—facing a shadowy face during meetings or battling reflective glare—you’re not alone. Together, we’ll uncover the secrets to optimizing your workspace lighting and avoid falling into this common trap.
Will Moving Your Light Change Everything? You Might Be Surprised
Many assume that the only way to improve is to buy a more powerful ring light or upgrade to a fancy setup. However, adjusting the position—moving your light slightly away from directly behind the camera—can significantly enhance your video quality. I learned this firsthand through trial and error, and it’s a game-changer. For more tips on transforming your workspace lighting, check out this comprehensive guide.
Before we delve into specific adjustments, recall that I initially believed that placing the light directly in the center was the only way. Trust me, I also feared that moving it would cause uneven lighting. But the reality is quite the opposite—better placement yields better results and a more natural look. Are you ready to see how small tweaks can dramatically improve your on-camera presence?
Let’s explore the practical steps to get your lighting right and elevate your video presence from mediocre to professional—starting now.
**
Adjust Your Ring Light Positioning
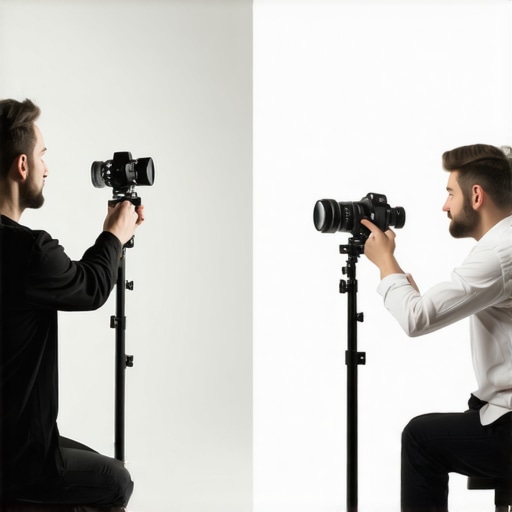
The first step is to move your ring light slightly away from directly behind your camera. Instead of aligning it perfectly in the center, place it at a slight angle—around 15 to 30 degrees—and elevate it about 6 to 12 inches higher than your camera lens. This creates soft, flattering light that reduces shadows and avoids glare. I recall fiddling with my light placement for an entire afternoon, shifting it incrementally, until I noticed my skin tone appearing more even and my eyes no longer reflected harshly. Practice makes perfect here.
Use Visual Cues to Find the Sweet Spot
Look for a position where the light covers your face evenly without causing hot spots or shadows. A handy trick is to observe your reflection on your monitor or a mirror. Adjust the light until your face looks naturally bright and even, with minimal shadowing. For example, I positioned my light so that it illuminated my cheekbones and forehead evenly, mimicking natural sunlight. If you’re unsure, photograph yourself at different angles—this helps you see what the camera captures and fine-tune accordingly.
Leverage Additional Workspace Lighting
Incorporate supplementary light sources to complement your ring light. Use a neutral desk lamp, preferably one with a high CRI (Color Rendering Index), to fill in any remaining shadows. Position this lamp at a 45-degree angle from your face, similar to the way photographers do it for portraits. This layered lighting provides depth and reduces flatness. I found that adding a small, adjustable LED desk lamp, especially one that allows color temperature adjustments, dramatically improved my video quality, making me look more professional and less washed out.
Control Light Intensity and Color
Being able to dim your lights and adjust color temperature is crucial. Cooler lights (around 6500K) mimic daylight and are ideal for video conferencing, while warmer tones (around 3000K) can create a cozy feel—useful for relaxed calls. I recommend testing different settings to see what best complements your skin tone and environment. For detailed ideas on setting the right color balance, check out bias lighting tips. Precise control ensures your face looks natural and reduces eye strain.
Incorporate Diffusers and Accessories
To soften harsh light and eliminate glare, consider adding diffusers or softboxes to your LED or ring lights. Even a simple translucent plastic sheet can work as a diffuser. I experimented with different diffuser setups—sometimes mounting a cloth diffuser over my ring light helped in spreading light evenly. If reflections persist on glasses or glossy surfaces, try angling your light differently or using a polarizer filter, which you can find in various accessories for LED lamps. These tweaks make a significant difference in professional-looking video quality.
Maintain Consistency and Fine-Tune
Once you’ve found a satisfying setup, stick with it consistently. Small changes during each call can reintroduce shadows or glare. Periodically revisit your adjustments, especially if your environment or equipment changes. For example, switching between daylight and evening lighting might require slight modifications. My routine became easier once I bookmarked my optimal positions and saved camera settings to match the lighting, ensuring quick setup for every session.
Remember, lighting isn’t a one-size-fits-all. Your workspace, camera angle, and personal preferences all matter. Experimenting with these steps will help you develop a setup that highlights your best features, reduces distractions, and elevates your professional appearance in every video call.
” alt=”Person adjusting ring light angle” title=”Adjusting ring light position to improve on-camera lighting” />
While many content creators and remote workers adopt bias lighting and LED desk lamps with good intentions, a common misconception persists: the idea that higher wattage or brighter lights automatically lead to better on-camera appearance. Let’s dig deeper into this myth and uncover the real nuances that separate effective lighting from mere brightness.
One widespread mistake is equating luminosity with quality. For example, some believe that installing the brightest LED lamps or overshooting the color temperature will make their setup superior. However, studies show that excessive brightness can cause glare and eye strain, ultimately reducing comfort and image quality. According to lighting expert professional advice, the key is to aim for optimal luminance levels—around 300 to 500 lux for video calls—not maximum wattage. Overly bright setups can wash out skin tones and lead to a flat appearance, especially if contrast isn’t managed properly.
Are Too Many Lights Making Your Workspace Less Effective?
Here’s an advanced trick I learned: layering multiple light sources without balancing their color and intensity can create a confusing visual environment. For instance, combining a high-CRI LED lamp with cool bias lighting might seem ideal, but mismatched color temperatures can introduce color-shift artifacts on camera, confusing viewers. This is where understanding the importance of consistent color temperature comes into play. Experts recommend sticking to a single, adjustable light source with a high CRI (above 90) and using diffusers to soften shadows—tools that bring your setup closer to the natural look you desire. For more on perfecting your workspace, check out this guide.
Another trap to avoid is the belief that more ambient lighting equals better. While ambient light fills in shadows, too much can flatten your appearance and reduce depth perception. Instead, strategic placement—like elevating your LED desk lamp at a 45-degree angle—can dramatically improve contrast and highlight facial features naturally. Remember, as studies suggest, the key is balance, not mere brightness. Too little light leads to shadows; too much creates glare. Finding the sweet spot requires understanding how different light angles and intensities interact with your environment.
Having the right lamp can make or break your on-camera presence. Modern LED lamps with adjustable color temperature and dimming features allow for precise control, which is essential for avoiding washed-out skin tones or unnatural shadows. Be cautious of the ‘set it and forget it’ mentality; fine-tuning your lighting setup as surroundings change — like seasons or room decor — ensures consistent quality. To learn about selecting the right desk lamp, visit this expert resource.
Finally, beware of the trap of believing that expensive or complex lighting setups are automatically superior. Often, simple adjustments—like moving your ring light just 2 inches higher or changing diffuser angles—produce remarkable improvements. The principle is to focus on subtle nuances that control how light interacts with your face and workspace, rather than relying solely on hardware upgrades.
Have you ever fallen into this trap? Let me know in the comments. Remember, mastering workspace lighting isn’t about blinding brightness or expensive equipment—it’s about understanding nuanced effects that elevate your professional image without unnecessary clutter. For more insights, explore this detailed guide.
Essential Tools for Consistent Lighting Performance
Maintaining optimal workspace lighting over time requires more than just initial setup; it demands reliable tools tailored for precision and ease. I personally rely on a high-accuracy lux meter, such as the Amprobe LM-150, to regularly measure light levels and ensure consistent brightness across different sessions. This device helps me verify that my ambient lux levels stay within the ideal range of 300-500 lux, as suggested by industry standards for video conferencing.
Another invaluable tool is a colorimeter like the Datacolor SpyderX. It allows me to calibrate my LED lamps and bias lighting, ensuring accurate color temperature adjustments and preventing unwanted shifts over time. Regular calibration is crucial because LED bulbs can drift in color quality after prolonged use, affecting skin tones and overall visual clarity.
Adopting Software Solutions for Dynamic Adjustments
Beyond physical tools, software like Luminance Calibration Suite enables me to set and automate brightness and color temperature profiles. These programs can synchronize with smart LED lamps, allowing for quick adjustments tailored to different times of the day or specific tasks. Setting schedules not only saves time but ensures your workspace remains optimized without manual intervention, reducing the risk of neglect.
How do I maintain workspace lighting over time?
Regular checks are vital. I recommend scheduling monthly light audits using your lux meter and colorimeter to catch any degradation early. Additionally, keep your equipment clean—dust and fingerprints can diminish light output and distort color. In my experience, updating firmware for smart lamps and replacing aged bulbs proactively prevents sudden drops in performance. Staying vigilant ensures your lighting setup continually supports your productivity and visual health.
As lumen management technology advances, integrating intelligent systems will become standard for proactive maintenance. Imagine smart lamps that notify you when light quality wanes or automatically adjust based on ambient conditions—these innovations promise to make ongoing upkeep even more seamless. For now, investing in quality tools and establishing routine checks sets a solid foundation for enduring workspace lighting excellence.
” alt=”Lux meter measuring workspace lighting” title=”Using a lux meter to monitor workspace light levels” />
Remember, maintaining your lighting system doesn’t have to be complicated. Using a dedicated lux meter and colorimeter enables precise, repeatable assessments, ensuring your environment stays optimized. I encourage you to try a monthly lighting audit with these tools, and you’ll notice a tangible difference in your visual comfort and content quality. Need guidance on selecting the best devices? Reach out via our contact page.
The Hidden Lessons I Discovered About Bias Lighting and Ring Lights
- Sometimes, the smallest adjustments—like tweaking your ring light’s angle—can dramatically elevate your video quality, more than upgrading your equipment.
- I’ve learned that over-brightening your workspace often does more harm than good—so understanding optimal lux levels is key to a natural, professional look.
- Patience is crucial; fine-tuning your lighting setup can take time, but the improved confidence on camera makes it well worth the effort.
- Trusting expert resources and tools, such as lux meters and color analyzers, has transformed my ability to maintain consistent, high-quality lighting.
- Consistency matters—developing a routine to regularly assess and adjust your workspace lighting ensures your appearance remains sharp in every call.
Resources That Elevated My Lighting Game
- This guide on workspace lighting transformation helped me understand how to combine different light sources effectively for a natural glow.
- The latest LED lamp innovations introduced me to adjustable brightness and color temperature features that I now rely on daily.
- For precise measurement and calibration, tools like the lux meter and colorimeter became essential in maintaining my ideal lighting conditions.
- Expert articles and tutorials available on the site continuously refine my setup, preventing common pitfalls like glare and shadows.
Your Moment to Brighten Your Space and Confidence
Optimizing workspace lighting isn’t just about good looks—it’s about empowering yourself to communicate more clearly and confidently on camera. Small, intentional adjustments can lead to big improvements in your professional presence. So, why wait? Start experimenting today, and watch your on-camera game transform. Remember, every perfect shot begins with the right light—your dedicated partner in making your workspace work for you.
What was the most surprising thing you learned about workspace lighting? Share your experiences or questions in the comments below — let’s illuminate the path to better video quality together!
,

About the Author
Ricardo Vargas
Director of Operations and Product Development
Ricardo Vargas is a seasoned professional in the lighting industry, currently serving as a Director of Operations and Product Development
LinkedIn Profile